Add a little sparkle to your holiday mantle with these Yarn Christmas Trees
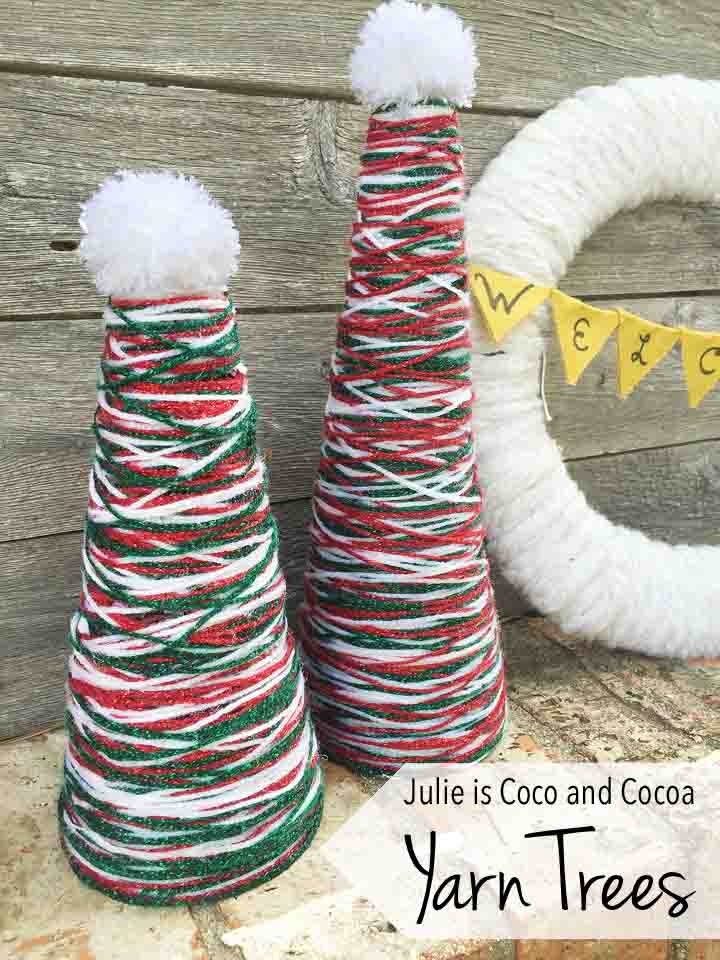
I kind of have a thing for yarn. I know, you’re shocked. And I love when cooler weather comes along and I can really embrace my obsession. Of course I knit and crochet plenty of wearable accessories, but I’m also a big fan of decorating with yarn. Whether that’s my ever evolving yarn wreath, ornaments, or these brand new yarn trees.
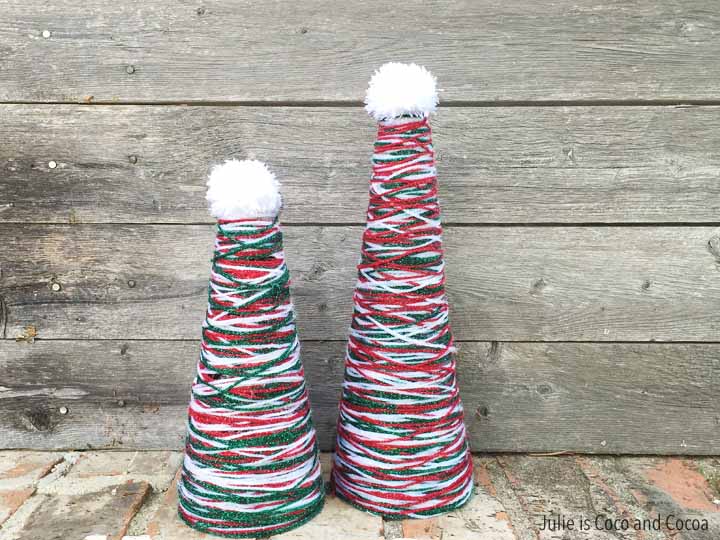
These yarn trees were a group project at my house. They are fairly messy, but also easy to clean up.
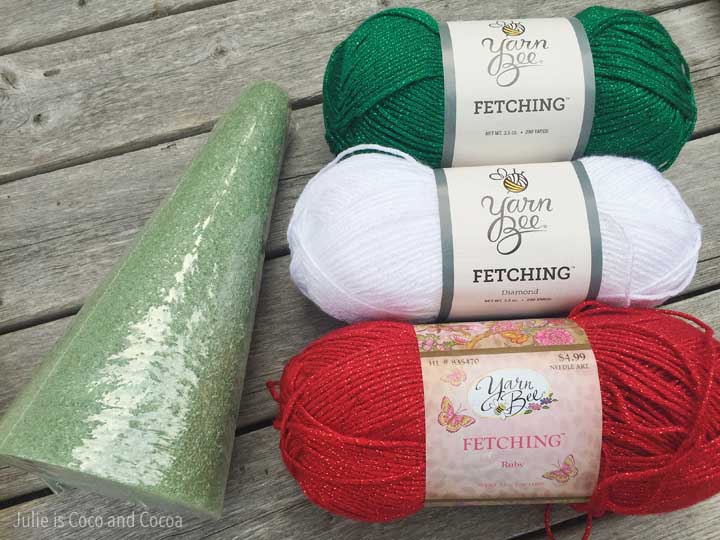
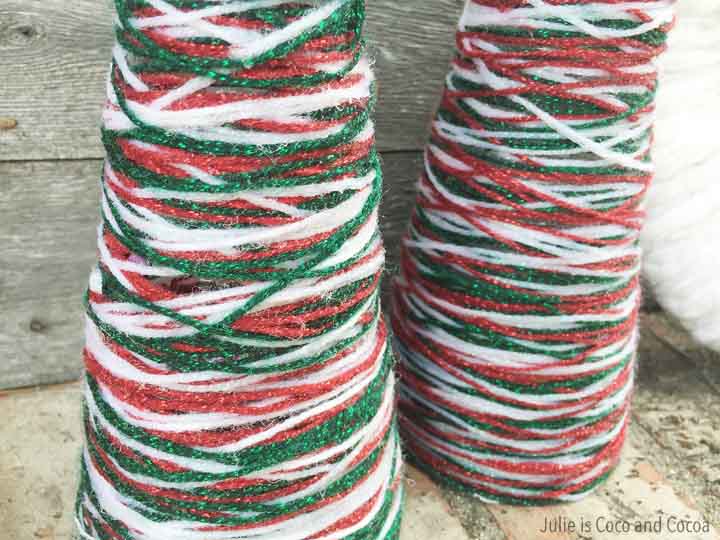
I picked out a trio of holiday colored yarns. These even are a little sparkly. In addition to the yarn you will also need a styrofoam cone, Mod Podge, plastic wrap, a plastic bowl, paper plates, and disposable gloves (optional but I highly recommend).
Start by pulling out sections of yarn, maybe a meter or so at a time. I pulled out several sections of yarn, cut them, and made little piles.
Then cover your styrofoam cone with the plastic wrap. This will make it easier to remove the cone from the yarn you wrap around it.
Pour the Mod Podge into the plastic bowl and put on your gloves. Put one section of yarn into the Mod Podge. Take one end of the piece of yarn and start wrapping it around the cone. Once that section of yarn is wrapped, dip another section of yarn and wrap it. I alternated the colors of yarn that I used. One of cone my pattern was green, white, red (repeated 3 times) and on the other cone I did red, white, green (also repeated as necessary). This let the cones look slightly different from one another.
Tip: In order for the trees to stand up straight make sure the yarn criss-crosses each other. Otherwise the trees will lean over.
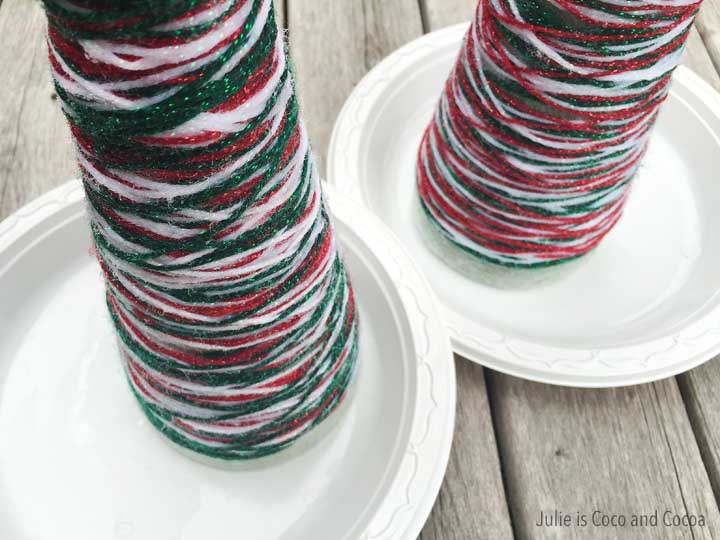
We wrapped our cones over paper plates. The plates helped catch any unwanted drips and also were a place to rest the cones as we worked.
Once the cone is fairly well wrapped you need to let it dry thoroughly. This will take several hours.
When your yarn is completely dry you can slide it off of the styrofoam cone. The plastic slid off with our yarn. Then all I had to do was pull out the plastic wrap from the inside of our yarn tree.
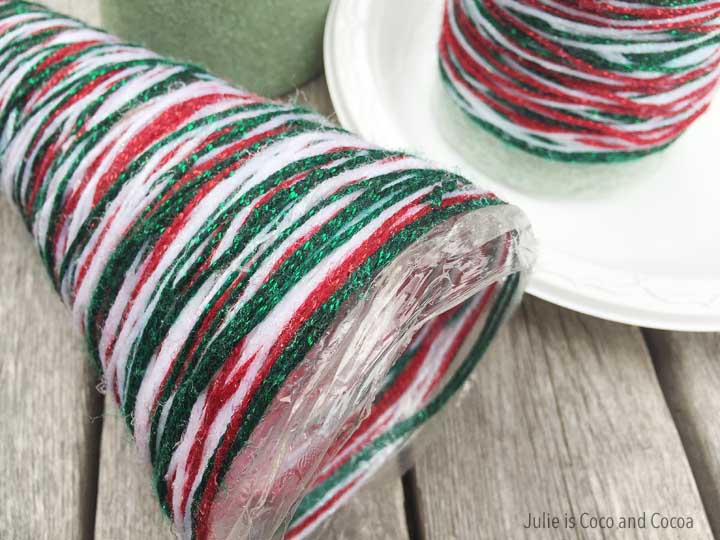
Here you can see some of the yarn strands that criss-cross over each other.
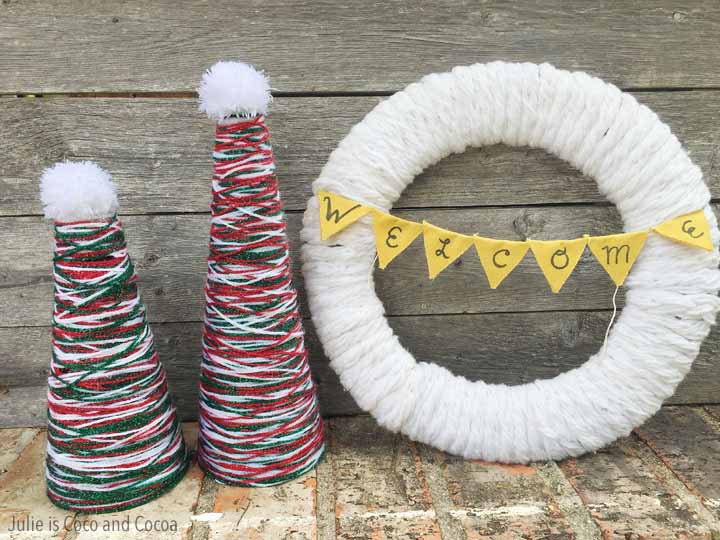
Once my trees were finished I thought they needed on final finishing touch, a pom-pom on the top. I used the white yarn to make two small yarn pom-poms. I made these by wrapping the yarn around 3 fingers. You can see my pom-pom video tutorial here.
My yarn Christmas trees are all ready for the holidays! There’s just something about adding yarn decorations that make the holidays feel more cozy to me. They’re going to look great sitting on a shelf with our other Christmas decorations.
Leave a Reply
You must be logged in to post a comment.