Use a plastic tablecloth to make this enormous wreath! See how your DIY tied wreath can help you celebrate a special occasion like a graduation

Want an oversized wreath that makes a statement but that doesn’t cost a fortune? You can make this enormous wreath using just a wire wreath base and plastic tablecloth!

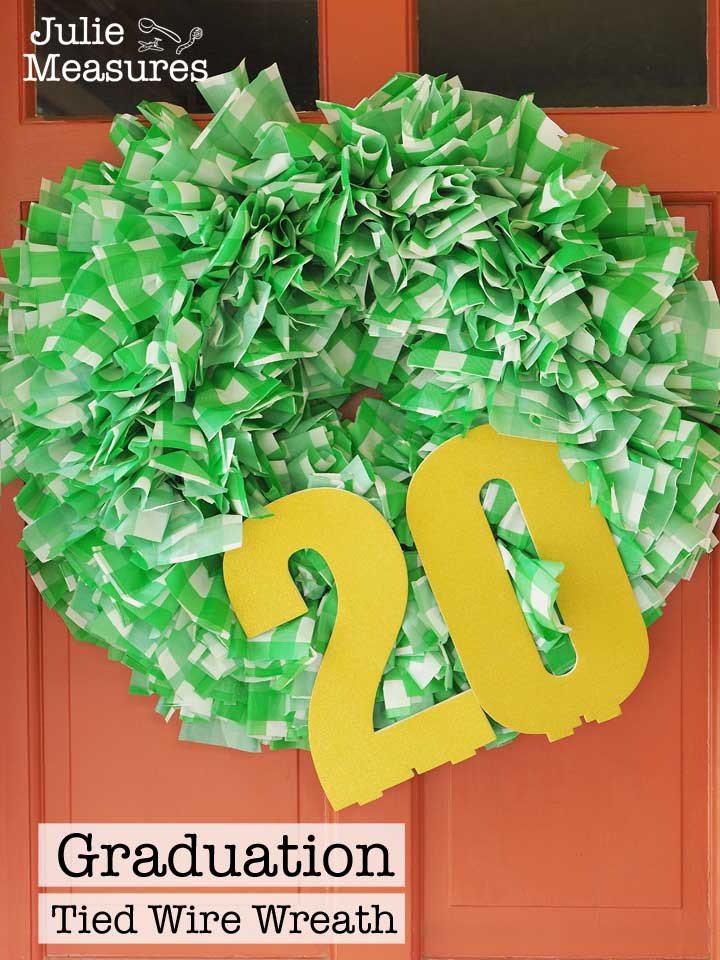
While the wreath looks great on its own, you can also add extra elements to it. I’m using mine to celebrate my graduation senior!
I’m not going to lie to you, this wreath is time consuming. But it’s also super simple? Grab your supplies, turn on a movie, and get crafting.

Tied Wire Wreath DIY
Supplies
- Wire wreath base
- Plastic Tablecloth (any color you want!)
- Scissors
- Numbers (optional)
- Hot glue gun (optional)
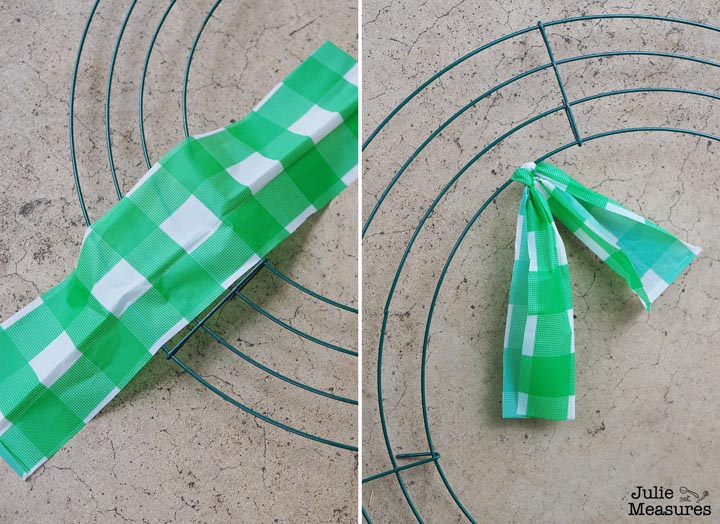
The first step is cutting the plastic tablecloth into strips. You can see I went with a plaid color rather than a solid. It worked out well that green and white are the school colors I wanted to represent with my wreath. I could have also used a solid green and a solid white.
My plastic strips are about 3 inches by 12 inches, but you can cut them into whatever size is best for you based on the tablecloth you’re using. Cut out lots of these strips. Hundreds of them.
My wire wreath base had 4, lets call them levels. I increased the number of strips I tied on each level. The innermost level had the fewest strips, as it’s the shortest. The level on the outside had the most, as it’s the longest.
And you really just tie them. A simple overhand knot is all you need. Just repeated over and over (and over and over).
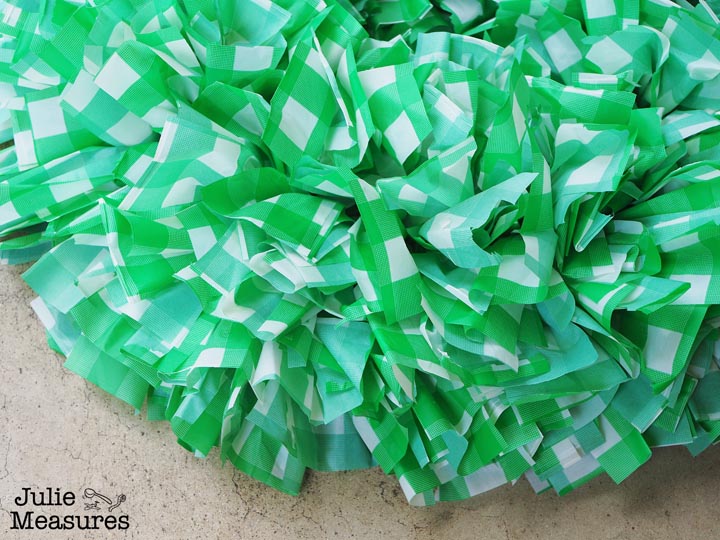
I tied approximately 60 plastic strips to the innermost level, 80 on the next level, then 100, and finally 120 on the outermost level. If you’re keeping track, that’s 360 plastic strips. Depending on how large your wire wreath base is you might need more or less.
I recommend tying the plastic strips to the innermost level first. They don’t need to be super close together, they will fluff up well. Count how many you used and then increase incrementally as you work outwards.
If you don’t want to add anything else to your wreath you could stop right here! If you want to make this wreath for a special occasion then keep going.

DIY Graduation Wreath
Since I’m turning my tied wreath into a graduation wreath the next step for me was to add the numbers for my son’s graduation year. You could also add school symbols, letters, or anything else you want.

Because this wreath is all about simplicity, I just hot glued my graduation numbers onto my wreath. Voila! My DIY graduation wreath is ready to hang on the door and celebrate my graduate.
Love making DIY wreaths? Check out this Flip Flop Wreath. And for more graduation ideas, check out this silly Graduation Gift Toolkit.
Leave a Reply
You must be logged in to post a comment.