Have a collection of toy guns at your house? Here is how to turn them into a steampunk Cosplay Prop

With three boys we have a fairly large collection of plastic toy guns that we have acquired over the years. Recently the kids and my husband have gotten interested in modding. And that interest inspired my husband to turn some of the kids toy guns into steampunk cosplay props.
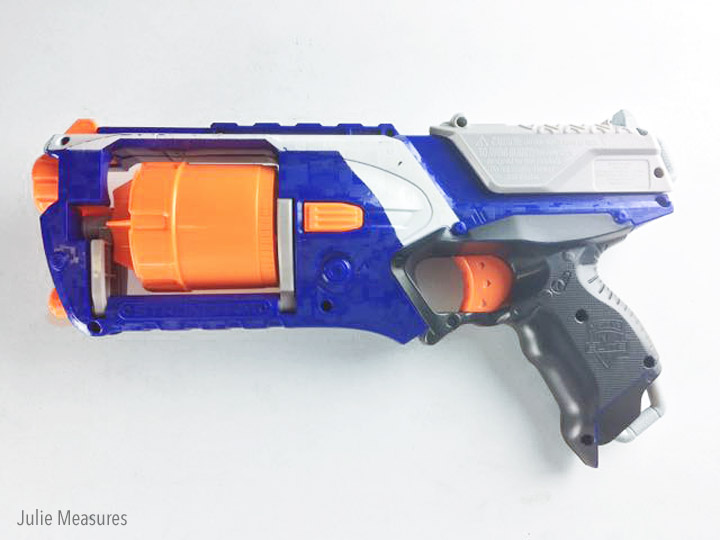
This was the before toy gun. Bright blue and orange, a fairly typical toy gun. This one is a revolver style and was the perfect inspiration for our first modded toy gun with steampunk flair.
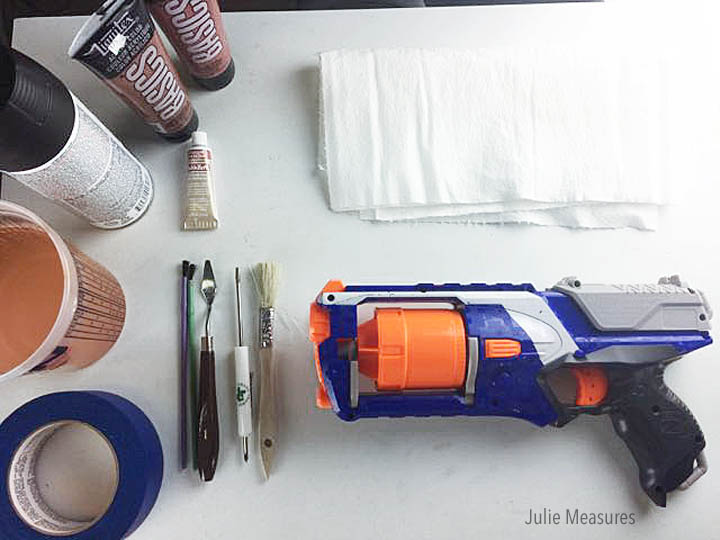
My husband gathered his supplies and headed out to his workshop for this toy gun cosplay mod. He used enamel spray paint, acrylic paint, metalizer, paintbrushes, and a screwdriver.
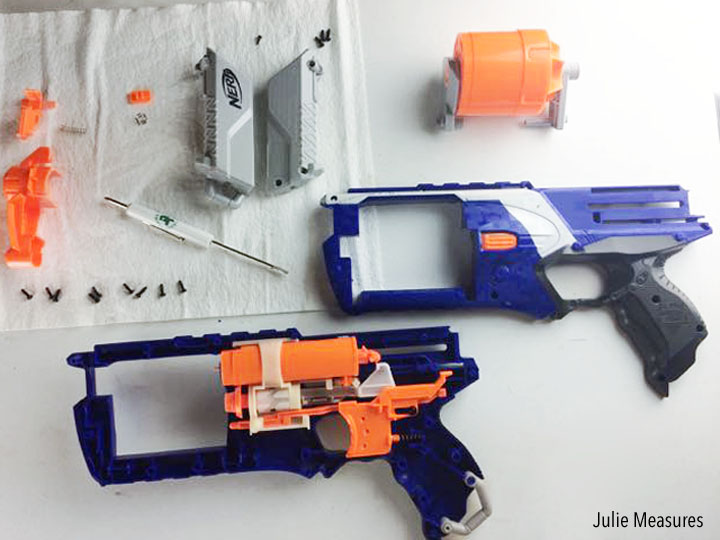
The screwdriver was for the first step, taking the toy gun apart. Make sure to keep track of all the screws and springs as you’re taking the toy apart.
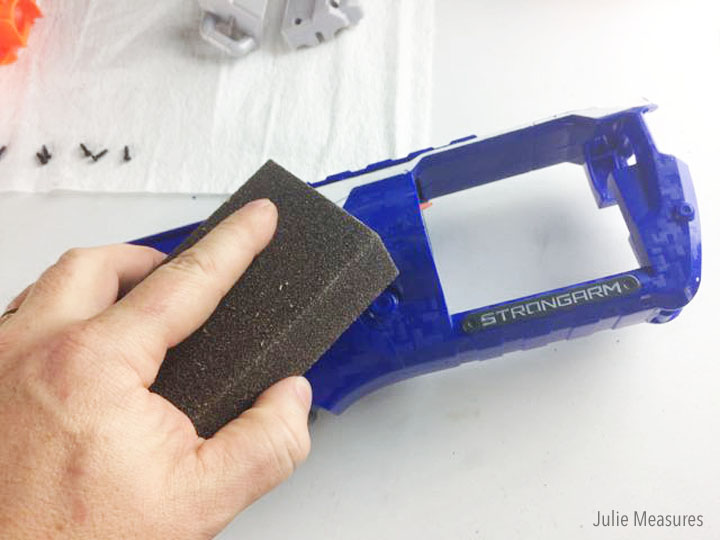
Then lightly sand the exterior of the gun and all the parts so that the paint will stick.
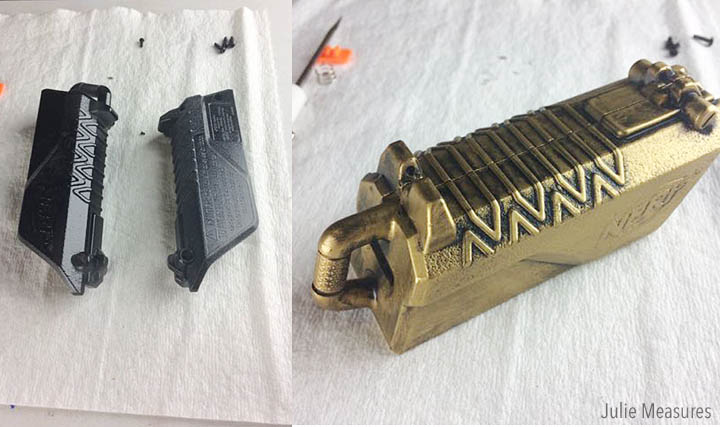
You’ll need to have an idea of what color you want the different parts to end up. For this gun the majority of the pieces got spray painted black to start. With the gun taken apart it’s easier to make sure all of the pieces get painted.
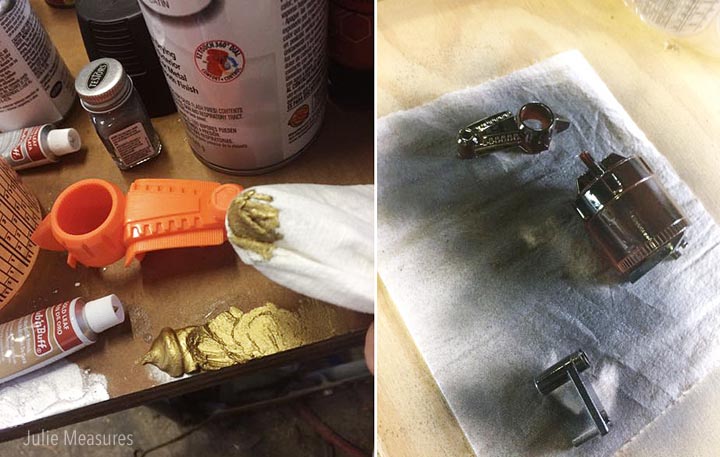
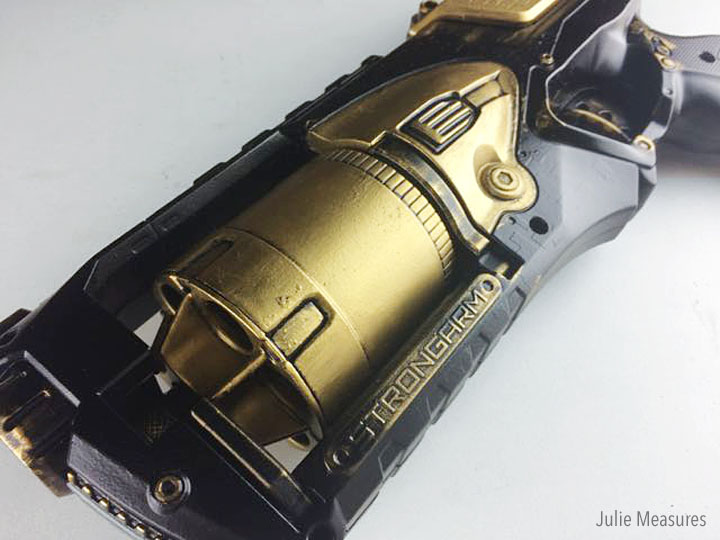
Then the metalizer was used to add gold metal detail. The gold is rubbed onto the pieces using a cloth. For some of the pieces the gold was added on top of the black.
Once the pieces are all painted and dry you can reassemble the gun.
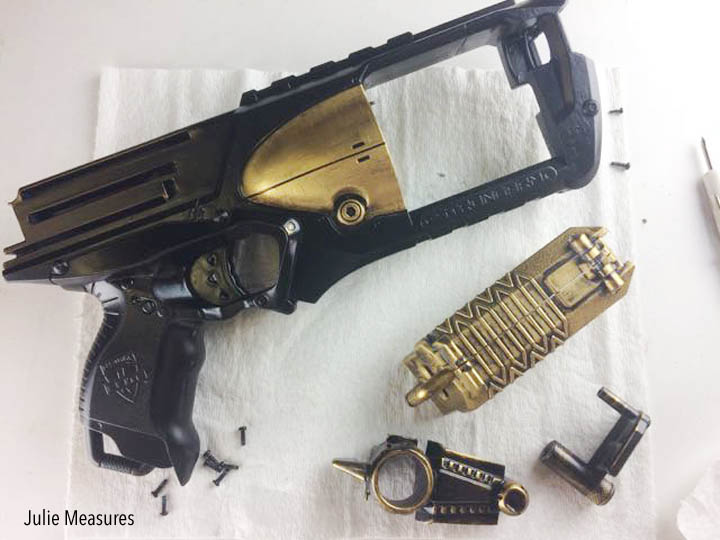
With the gun reassembled you can focus on additional details, like adding metalizer to the screws.
The final step was to ‘weather’ the outside of the toy gun and add some dirt and details. My husband used acrylic paint for this part.
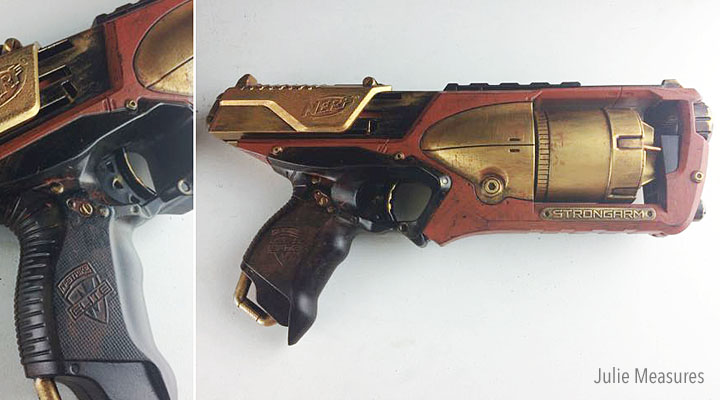
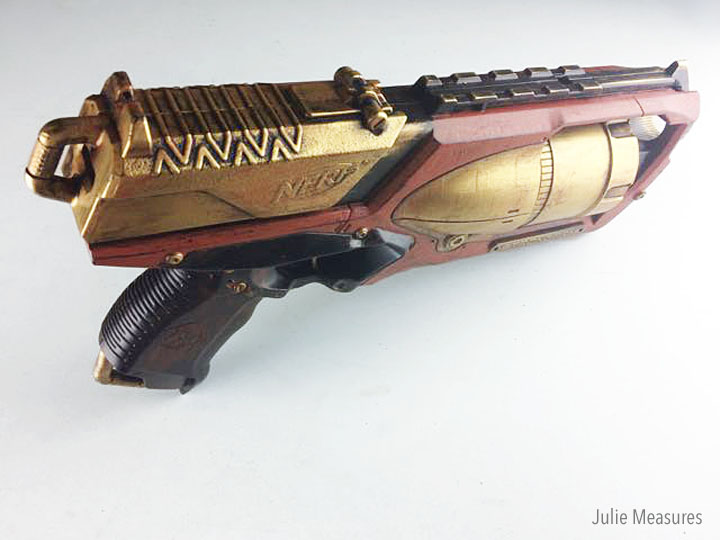
The finished modded toy gun cosplay! Let it dry and cure completely before playing with it. Our finished toy gun was designed primarily for costume use and indoor play. Please be aware of local laws in your area that may require toy guns to display an orange tip on the barrel.
If you want to order a finished cosplay steampunk toy gun you can find them HERE
Leave a Reply
You must be logged in to post a comment.