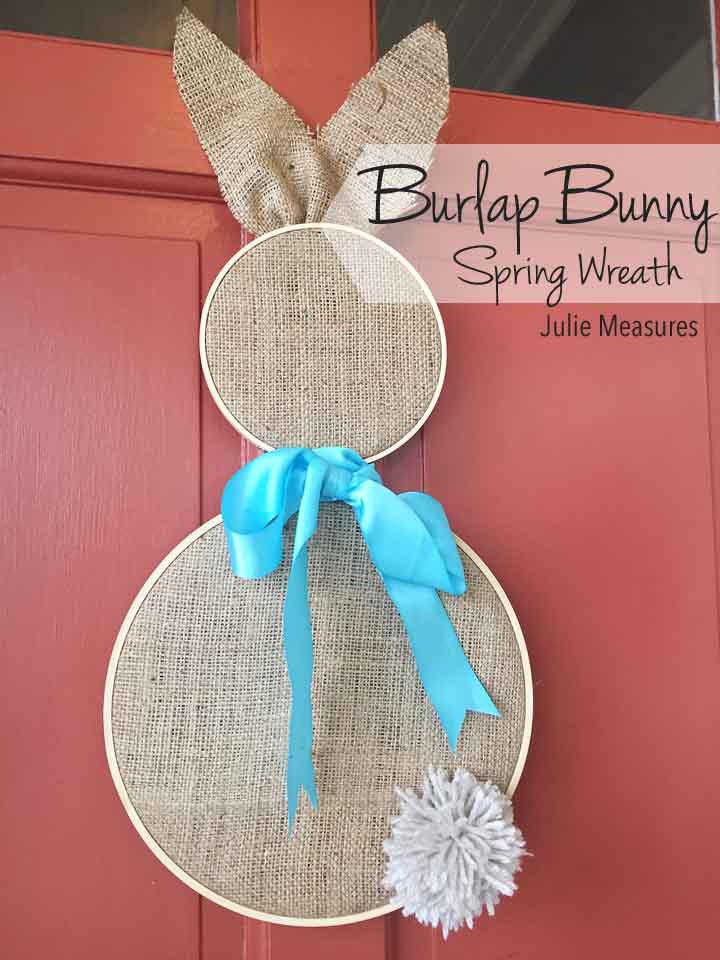
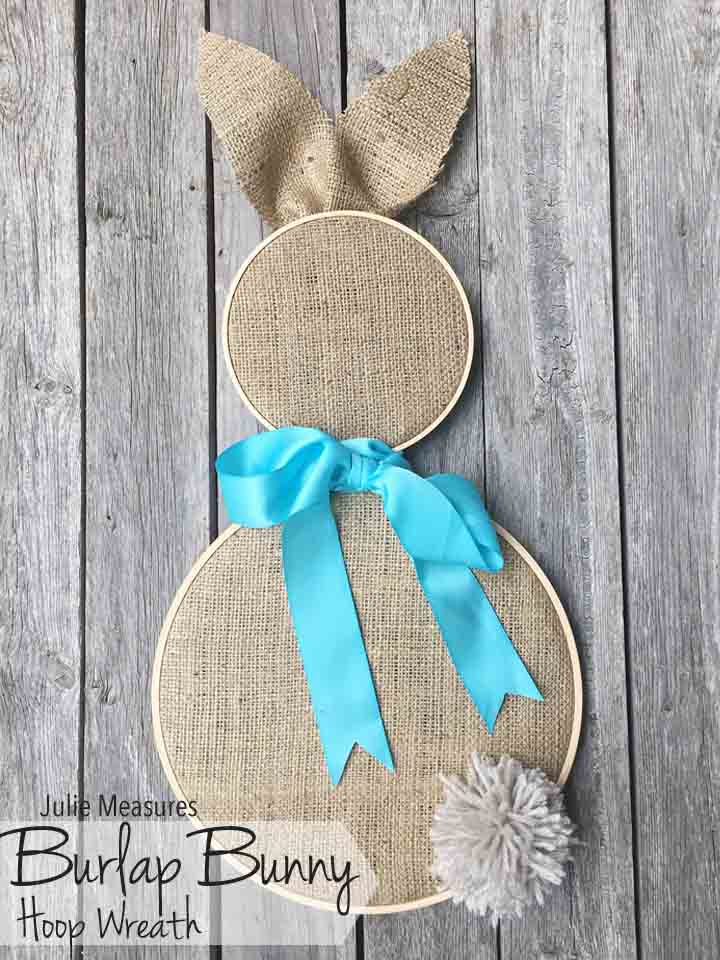
Create this quick and easy Burlap Bunny spring wreath just in time for Easter
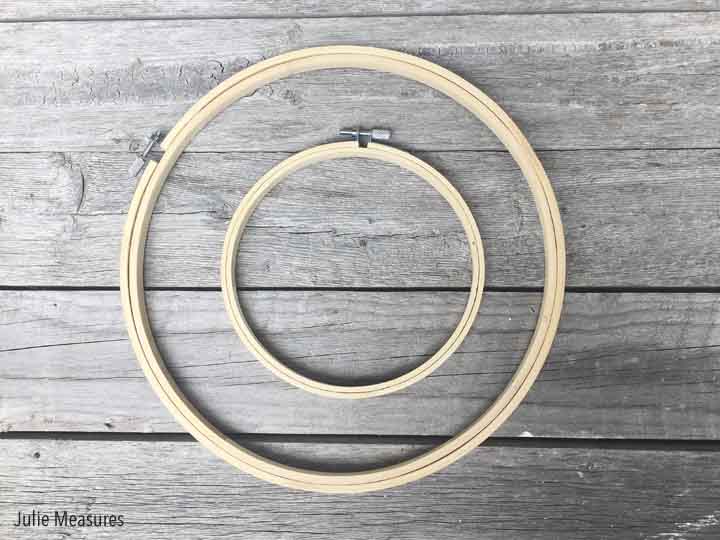
If you’re looking for a versatile craft supply, grab a stack of embroidery hoops. There are just so many things you can make with them! I always have a stack of them in various sizes in my craft supplies.
Another versatile craft supply? Burlap. I happen to have a lots of burlap. It’s technically not even really ‘my’ burlap. It drove around in the trunk of my Mom’s car for about a year. It’s been shuttled back and forth between various houses. Used for a few weddings. There is a massive roll of it that we just keep using. So with such an ample supply it’s only fitting that I use some of it for a quick and easy spring Easter Burlap Bunny wreath.
Burlap Bunny Hoop Wreath
Supplies
- Embroidery hoops
- Burlap
- Tape (duct tape works great)
- Ribbon
- Yarn
- Hot glue gun
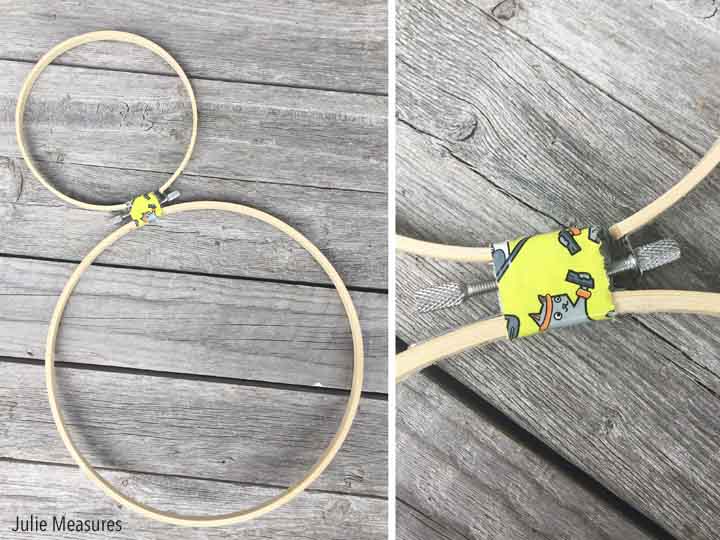
Begin by attaching your two embroidery hoops. Join them where the screws are and use the tape to attach them to each other. Because of the thickness of the burlap you don’t need to worry about being able to adjust the tightness of the hoops.
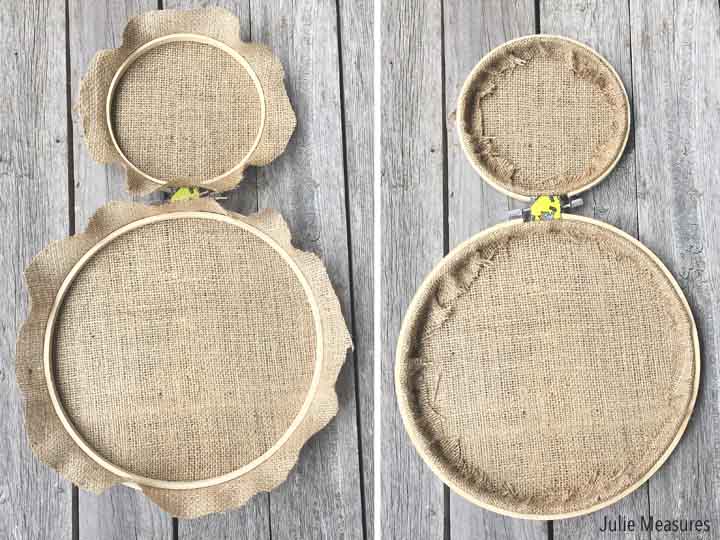
Place the burlap in the embroidery hoops and trim it down. Then use hot glue to fold over the edges to finish the back.
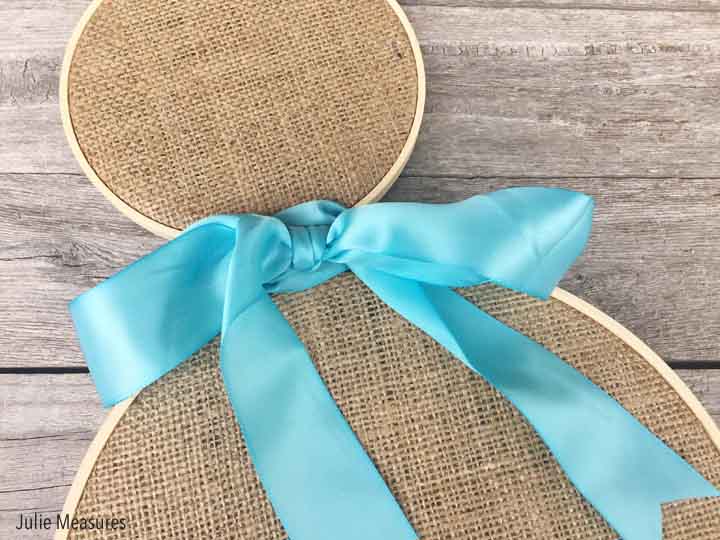
The ribbon gives the bunny a nice accessory and covers up the tape where you attached the embroidery hoops.
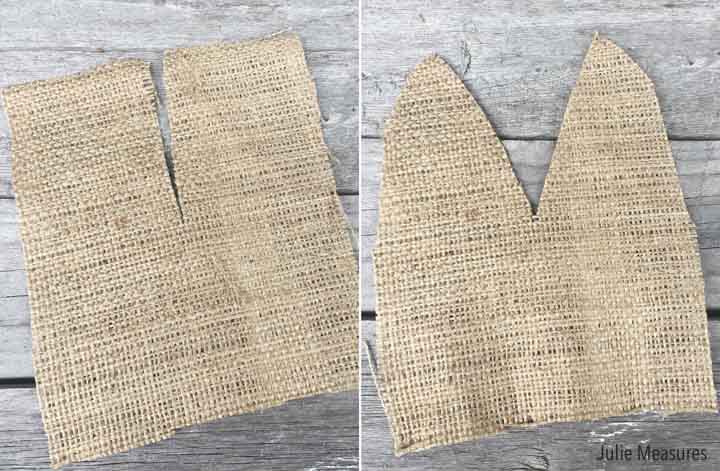
Of course our bunny needs some ears. Cut a 9″x6″ rectangle. Cut down the center of the rectangle lengthwise, about halfway down. Then trim the ears to give them some shape.
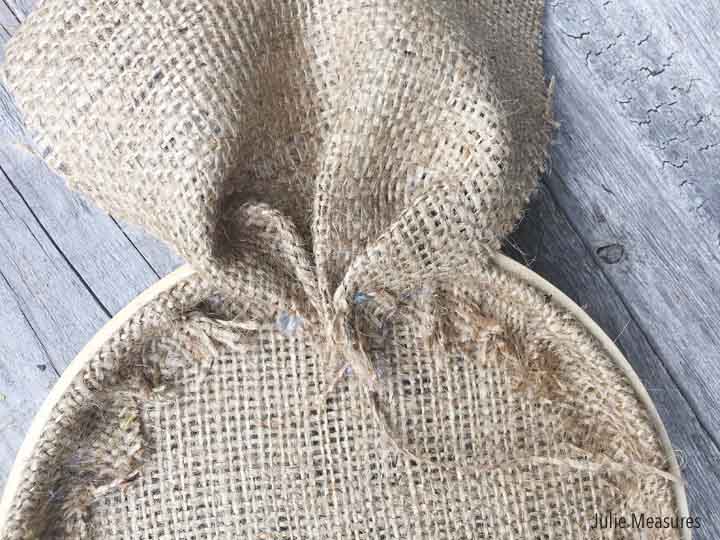
Bunch together of the bottom of the ears and attach them to the back of the embroidery hoop using more hot glue.
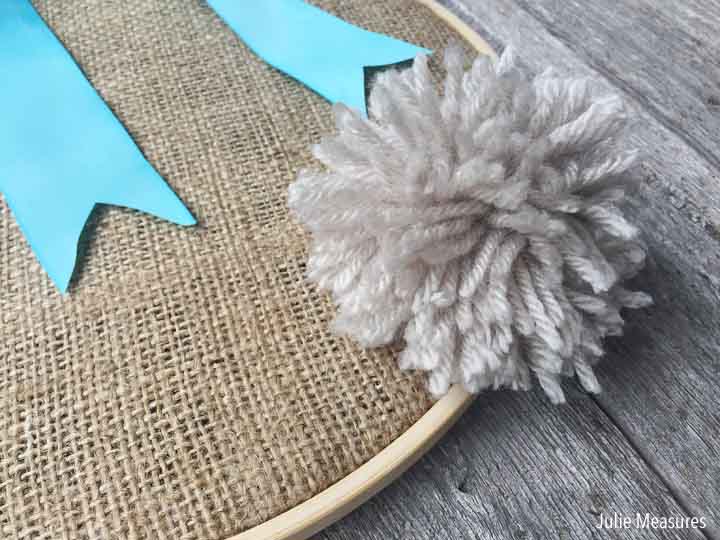
For a finishing touch you can give your bunny a fluffy tail by making a yarn pom-pom.
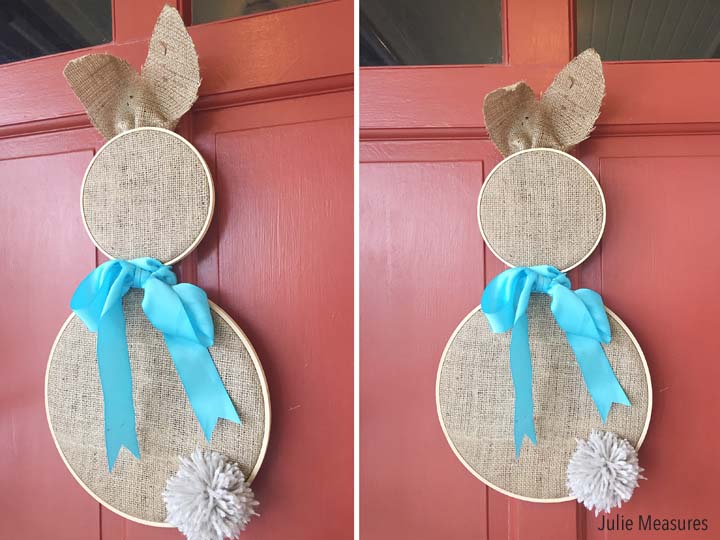
And you can hang up your bunny as a wreath for your front door. Of course it would also look adorable hanging as Easter decor somewhere inside your home as well.
I’ve got more burlap crafts planned for my spring decorating, including some burlap bunny bunting and even napkin ring holders.
Want more Easter embroidery hoop projects? Click HERE for am adorable Crochet Easter Bunny Hoop!
What size were your hoops on the bunny wreath?
Hi Kim! My hoops are about 7 inches and 10 inches.