Julie Measures

Measure your life by yards, cups, and miles

  • Facebook
  • Pinterest
  • Twitter
  • Instagram
  • Google+
  • Crafts
    • DIY
    • Knit
    • Crochet
    • Cross Stitch
  • Recipes
    • Appetizer
    • Breakfast
    • Dessert
    • Dinner
    • Drinks
  • Knit and Crochet Patterns
    • Pattern Shop
      • Knitting Patterns
      • Crochet Patterns
      • Cross Stitch
  • Holidays and Seasons
    • Christmas
    • New Years
    • Valentine’s Day
    • St. Patrick’s Day
    • Easter
    • Fourth of July
    • Halloween
    • Thanksgiving
    • Summer
    • Fall
    • Spring
  • Travel Tips
  • Meet Julie
    • Contact

finger knitting tutorial

February 19, 2013 by Julie 11 Comments

I’ve really enjoyed doing several finger knitting projects recently. (Here, here, and here to see a few.)

I figured it was time for me to share my own finger knitting tutorial!

Finger knitting does take some time, but it doesn’t require anything more than your fingers and some yarn. And you don’t have to count any stitches.

Most of my yarn is worsted weight, so I prefer to use two balls of yarn at once to make it a little bulkier.

My pictures and descriptions are based on me being right-handed. 

finger knitting tutorial
The first step for finger knitting is wrapping the yarn around your fingers.
Start with the tail of the yarn between your thumb and forefinger.
Then turn your hand around to face you (the tail of the yarn will be hanging off the back).
Weave the yarn over your forefinger, behind your middle finer, and in front of your ring finger.
Then wrap the yarn around the back of your ring finger, over your middle finger and behind your ring finger.
Then repeat so you have two rows on each finger.

finger knitting tutorial

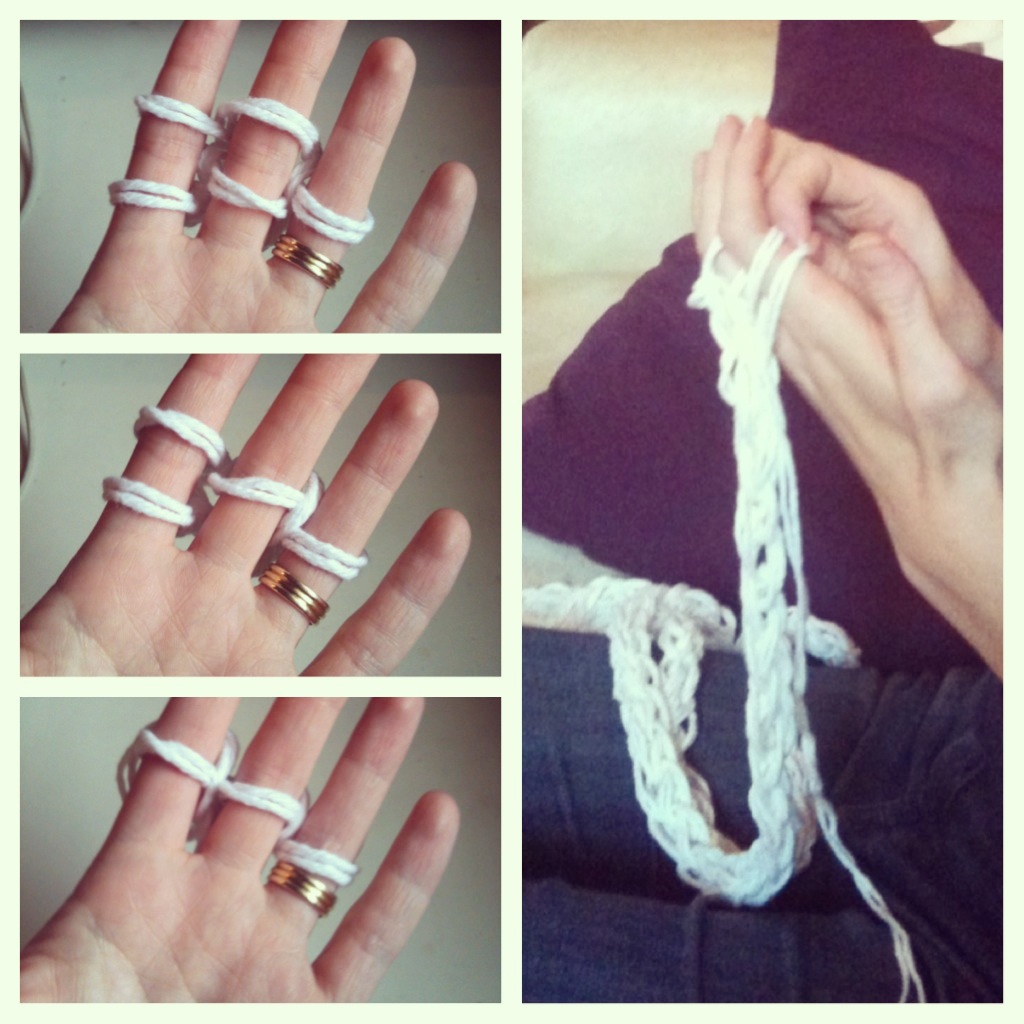
The second step is to pull the bottom row up and over the top row.

Start with the ring finger, then the middle finger and forefinger.
Now you will have one row on each finger again.
Repeat the first step of wrapping the yarn so you have two rows again.
Then back to the second step of pulling the bottom row over the top row.

Keep repeating these two steps until your rope is as long as you want. When you are finished simply cut the yarn and bring the end through each of the loops.

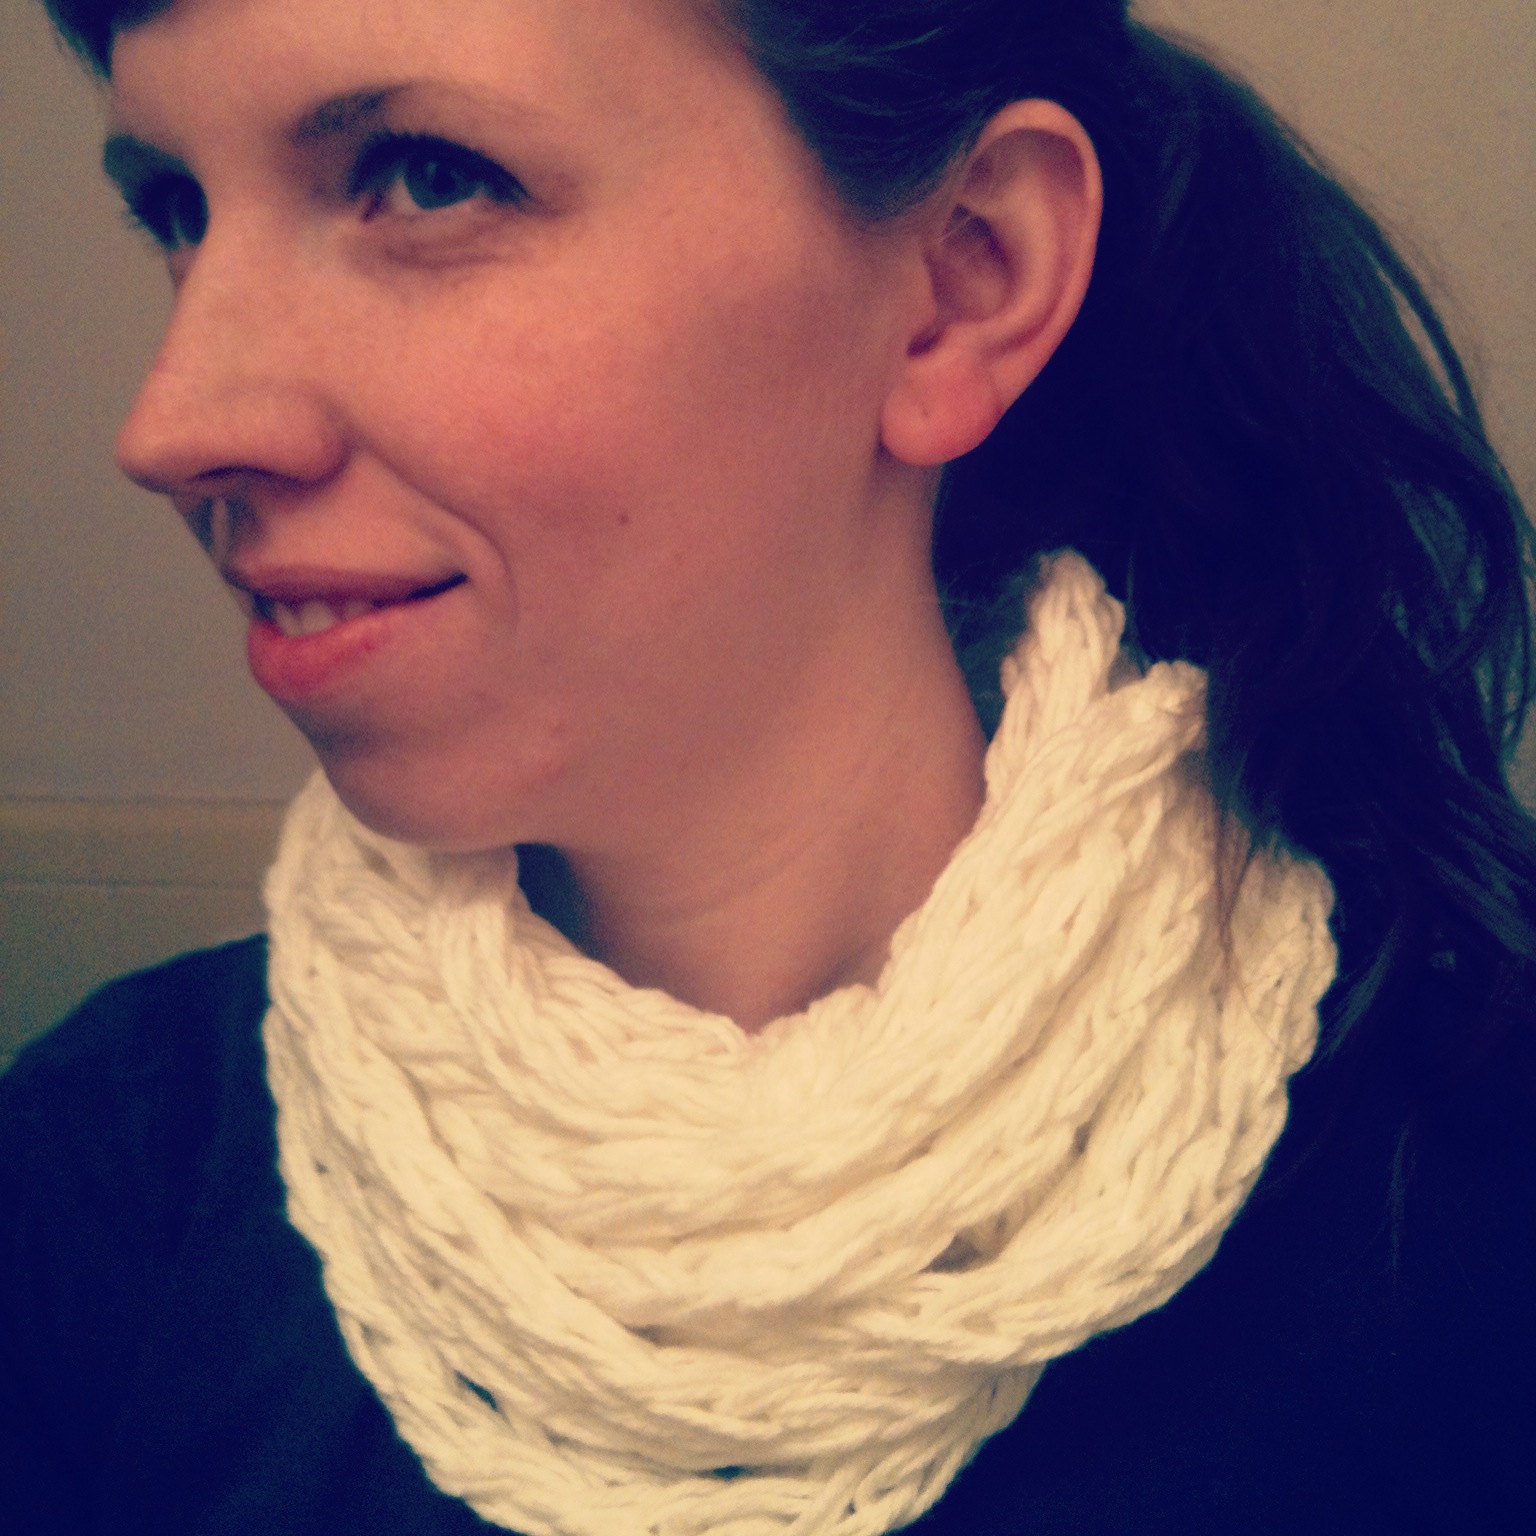
Finger knitting is great because there are so many things you can use the rope for. Including accessories! With this white rope I looped it around several times and wore it as a scarf.

«
»

Filed Under: Craft Tagged With: diy, finger knitting, knitting

Comments

  1. Bev says

    February 21, 2013 at 8:23 pm

    hi, i’m following the “fluster creative muster” hop. i would love for you to visit my blog and follow if you like it.

    http://www.blackinkpaperie.blogspot.com

    thanks
    new follower bev

    Log in to Reply
    • Julie{isCocoandCocoa} says

      February 22, 2013 at 4:50 am

      Hi Bev! and Welcome! I’m off to visit your blog now 🙂

      Log in to Reply
  2. Fluster Buster says

    February 23, 2013 at 2:08 am

    I love this Julie, it would be a great thing to teach the kids. Thanks for sharing at Fluster’s Creative Muster. I’m looking forward to seeing what you link up next week.

    Log in to Reply
  3. ngnrdgrl says

    February 23, 2013 at 5:19 pm

    I am a fan of finger knitting. It’s so much fun. 🙂

    Log in to Reply
    • Julie{isCocoandCocoa} says

      February 23, 2013 at 11:37 pm

      Isn’t it?! And I love all the different things you can make with it. Thanks for stopping by and commenting!

      Log in to Reply
  4. Ana Lopes says

    February 23, 2013 at 10:20 pm

    Amazing!!! Love it! Thanks so much for sharing the great tutorial! Would love to have you visit me sometime.
    Hugs from Portugal,

    Ana Love Craft
    http://www.lovecraft2012.blogspot.com

    Log in to Reply
  5. Theresa says

    February 24, 2013 at 3:03 am

    That scarf is so pretty. I had to click over, because I couldn’t believe it was finger knitting! Great tutorial, thanks so much for sharing.

    Log in to Reply
  6. Michelle says

    February 25, 2013 at 5:27 am

    How pretty. I’ve never heard of finger knitting before, I wonder if I could tackle it….
    Thanks for linking up to our Crafty Thursday Obsessions link up, hope to see you back this week 🙂

    Log in to Reply
  7. Christine says

    February 25, 2013 at 11:22 pm

    Oh this looks like so much fun!! I have to try it!

    Thanks so much for sharing this at The DIY Dreamer… From Dream To Reality! Can’t wait to see what you link up tomorrow!

    Log in to Reply
  8. Anonymous says

    February 26, 2013 at 11:31 pm

    Thank you for sharing with the Clever Chicks Blog Hop this week; I hope you’ll join us again!

    Cheers,
    Kathy Shea Mormino

    The Chicken Chick

    http://www.The-Chicken-Chick.com

    Log in to Reply
  9. Medworldis.Com says

    April 29, 2020 at 1:17 am

    We love this Finger Knitted Necklace and you can use old T-Shirts as yarn for these projects. This project is very simple and will make a lovely accessory for your favorite outfits.

    Log in to Reply

Leave a Reply Cancel reply

You must be logged in to post a comment.

Hi! I’m Julie

Follow Julie Measures

  • Facebook
  • Instagram
  • Pinterest
  • Twitter
  • YouTube

What’s New

  • I Need S’more Friends Like You – Valentine’s Day S’mores
  • You Me Oui – Valentine Day Craft
  • Best Tours in DFW
  • How to Make a Vision Board
  • Snowman Hat Knit Pattern

Subscribe

Join our mailing list to receive updates in your inbox.

Disclosure

Copyright © 2023 · Delightful theme by Restored 316

Copyright © 2023 · Delightful Pro Theme on Genesis Framework · WordPress · Log in