This shop has been compensated by Collective Bias, Inc. and its advertiser. All opinions are mine alone. #AmopeForTheHoliday #CollectiveBias
Treat yourself, or someone else, to an at-home spa day with these DIY Peppermint Shower Melts
With Christmas right around the corner Moms everywhere need a spa day! I know that I do. This year I thought I would treat myself to a little at home spa action. I made these really easy DIY Peppermint Shower Melts. Give yourself a treat in the shower and get in the holiday spirit with the peppermint scent all at the same time.

You really only need 5 ingredients to make these shower melts, and there is a good chance you have most of them in your kitchen. I used corn starch, sea salt, red food coloring (I used a gel food coloring), peppermint essential oil, and water.

I started by combining my dry ingredients, the corn starch and sea salt. Then I added the drops of peppermint essential oil and stirred it all together.

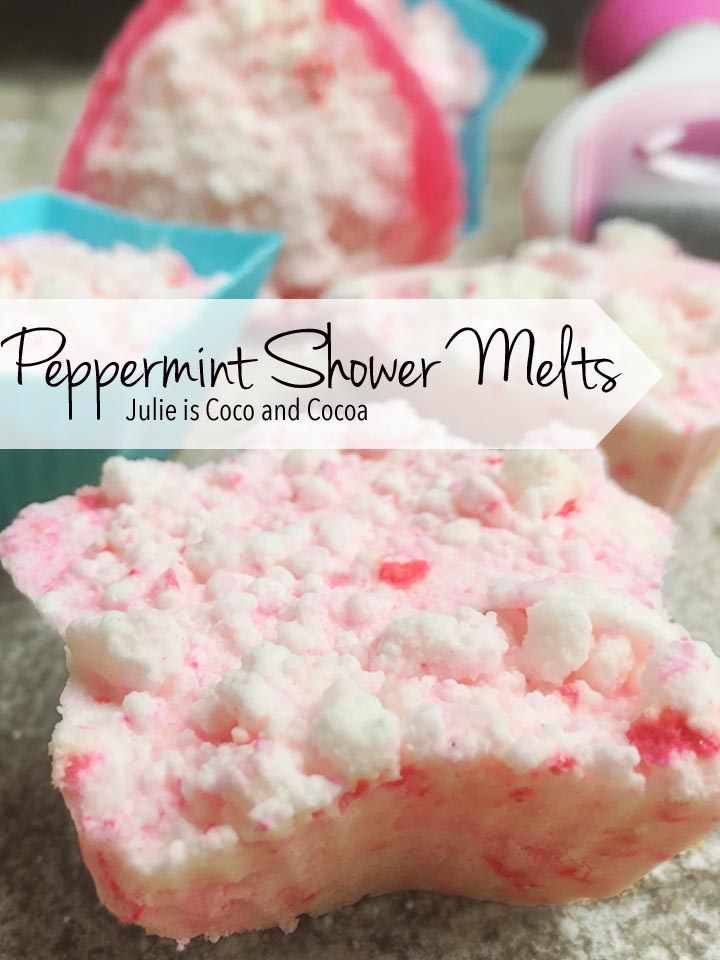
Once the oil was added (you could also use whatever scent you like) I added the red food coloring. This step is completely optional but I wanted my peppermint shower melts to look like peppermint. So I added several drops of the gel food coloring and stirred.
Now the you won’t really see anything change color yet, that comes next. And the melts are still completely powdery right now.

But the next step is to add the water. You’ll do this slowly, a tablespoon or few drops at a time, until it makes a thick paste. I tried not to overstep once it was mixing because I wanted the peppermint swirl look and not for it all to turn out pink.

Then I scooped my paste mixture into my silicone baking molds. You could also use an ice cube tray. Put the melts into the freezer to harden for at least one hour.

My spa day wasn’t complete without a run to Target to pick up the Amopé® Pedi Perfect™ Electric Foot & Nail File. This holiday you can give yourself the gift of soft, beautiful feet and naturally shiny nails.

After at least an hour in the freezer, I left mine in there overnight, you can take them out and remove them from the silicone molds.

Then they’re ready to use! Simply place one on the floor of your shower and then the aroma fill the room while you run the water. Store the melts in a cold, dry place or keep them in the freezer until your ready to use them.
Peppermint Shower Melts
Supplies needed:
- Silicone molds or an ice cube tray
- 1 cup of corn starch
- 1/2 cup sea salt
- 20 drops of Peppermint Essential Oil
- Red food coloring, optional*
- Water – 3 to 4 tbsp to start, will probably need more
- Spoon
- Mixing bowl
Directions:
- Combine the corn starch and sea salt in mixing bowl
- Add the essential oil and mix well.
- You can now add in a few drops of the red food coloring if you wish (I used a gel food coloring). Continue to stir. You probably won’t see the color change until the next step. The mixture will be very powdery.
- Slowly add in the 3 tablespoons of water. Continue to mix as the colors disperse and you notice that clumps are forming. Add water a few drops at a time and mix well. When a thick paste has been created, transfer the mixture to the silicone molds or ice cube tray.
- Freeze for at least an hour.
- You now can enjoy your peppermint essential oil shower melts.
- Store the melts in a cold dry place or back in the freezer until you are ready to use one. Then place it on the floor of your shower for some peppermint aroma!

Get 10% off all Amopé® gadgets from now through the end of the year. Pick one up for your own spa day and gift them to friends along with the shower melts!
This is the first time I’m hearing of shower melts! They are so cool! Peppermint is a great scent to start your day with. And so festive! #client
These are so pretty! I am going to make them to take to our hostess for Thanksgiving. Thank you for the idea – I already have ALL the ingredients!!!!