Kickoff to Homecoming! Be ready with these tips and tricks for making your own DIY Homecoming Mum.
Have you ever thought about adding lip gloss or bubbles to your mum? Discover the fun of a DIY Homecoming Mum and all the ways to personalize your mum.
Mum Making Supplies
- Ribbon
- Specialty Ribbon
- Bead strands
- Feather strands
- Bells
- Plastic Charms
- Letter stickers
- Long reaching stapler
- Hot glue and glue gun
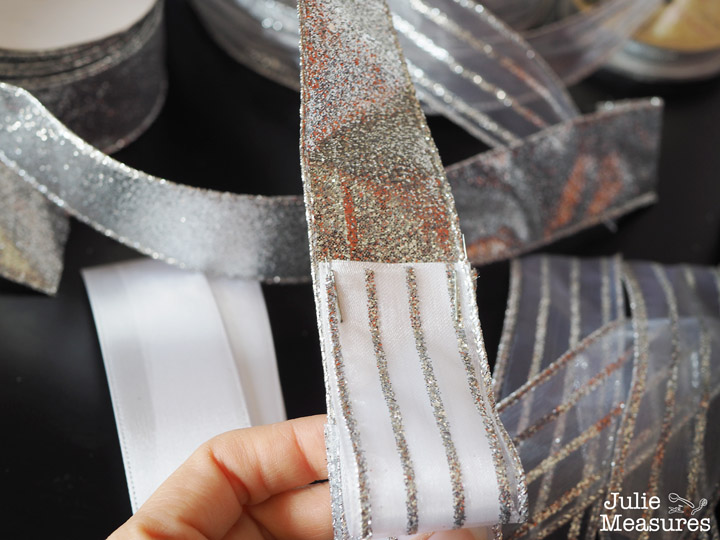
Get ribbons in various widths and textures. Grab some ribbons that are see through to layer with other ribbons. some see through
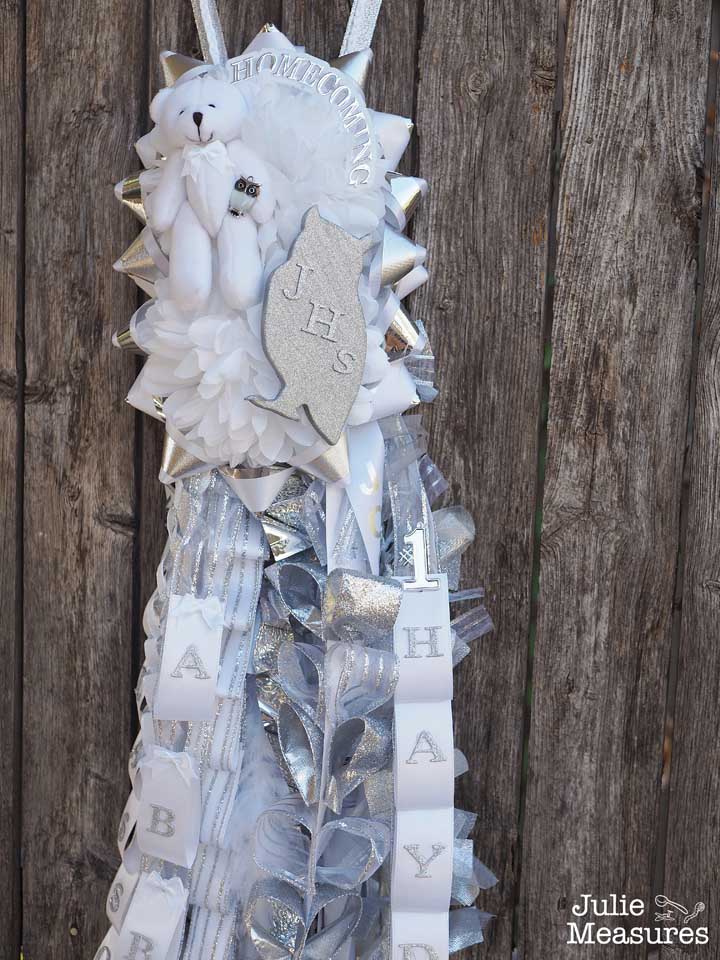
The standard rule for mums is that they should be 3 feet in length. Depending on the height of the girl, and how elaborate of a mum you are making, you can adjust some, but that gives you a starting point.
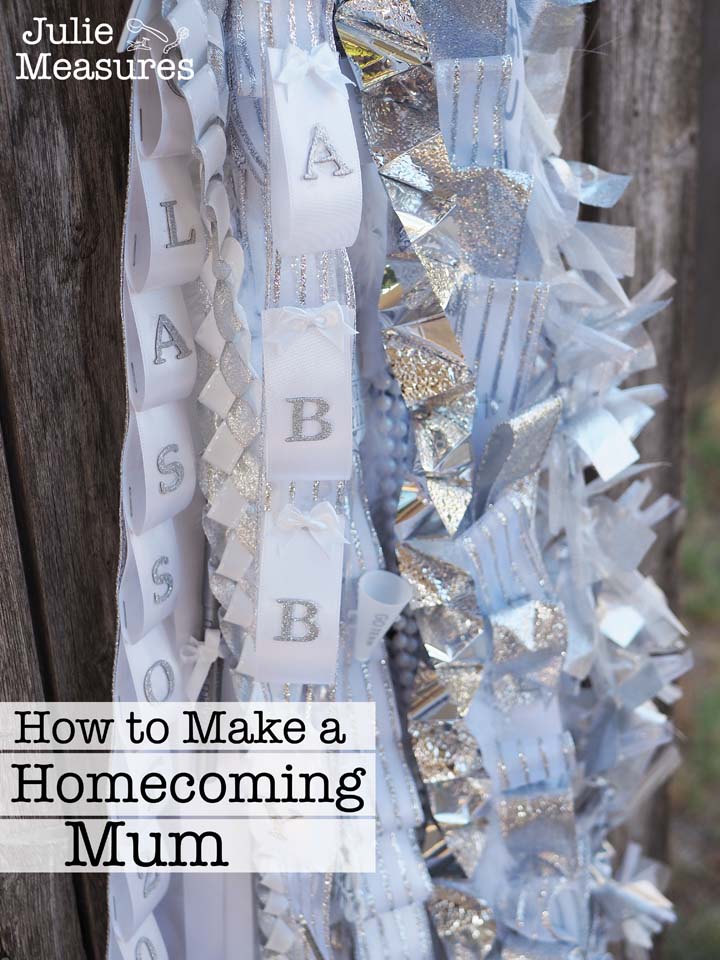
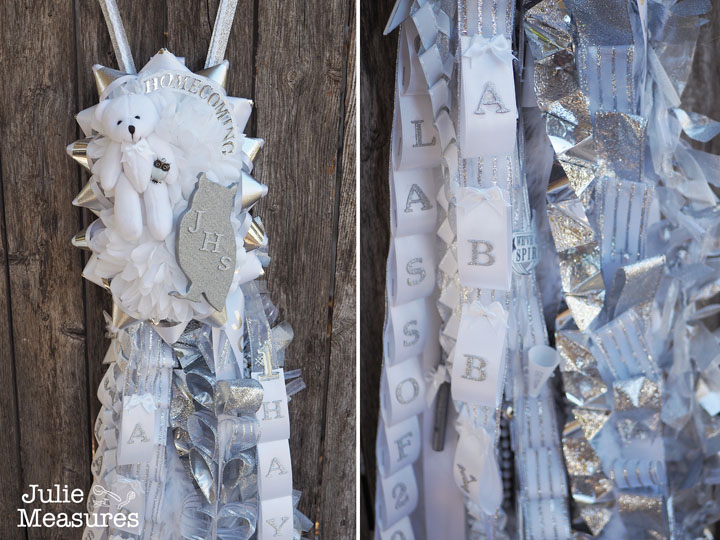
Senior mums are all white and silver (which is what I’m making here). All other grades are school colors with white highlights.
DIY Homecoming Mum – Loop Ribbon
If this is your first DIY mum, the loop ribbon is the perfect place to start. You’ll need at least two different types of ribbons, a wide ribbon for the background and a contrasting ribbon for the top. I’m actually using three ribbons because for my loops I’m layering a see through silver ribbon on top of the solid white ribbon.
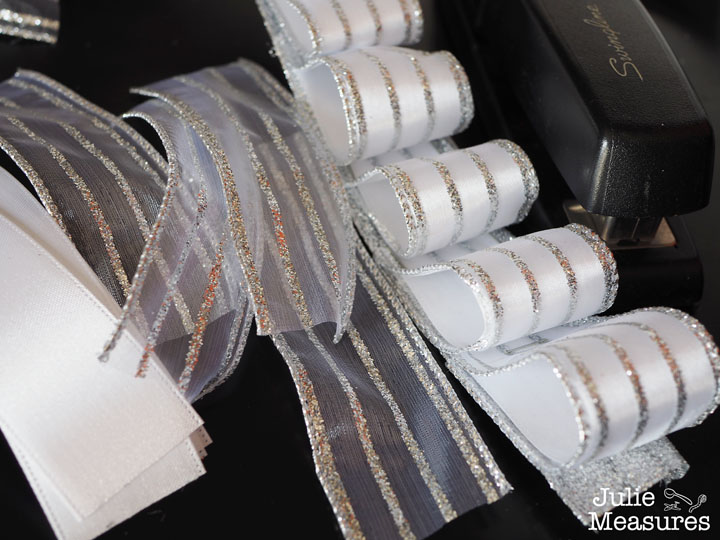
If this is your first DIY mum, the loop ribbon is the perfect place to start. You’ll need at least two different types of ribbons, a wide ribbon for the background and a contrasting ribbon for the top. I’m actually using three ribbons because for my loops I’m layering a see through silver ribbon on top of the solid white ribbon.
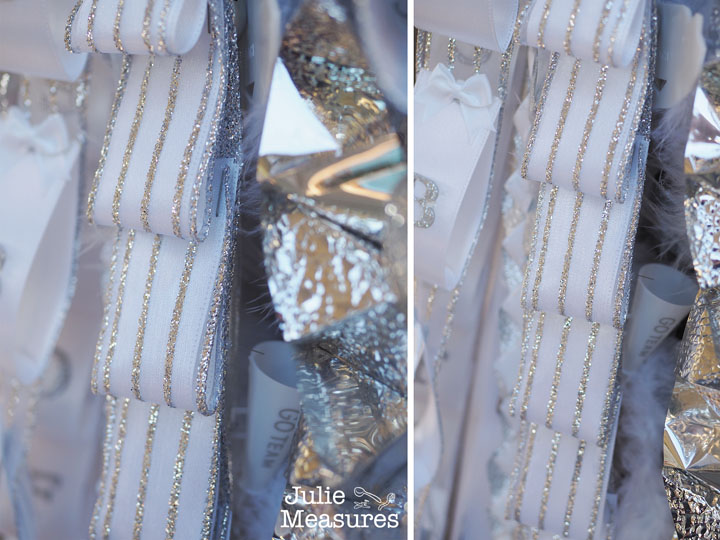
First decide how big you want your loop to be. This is a personal preference. Once you decide you’ll need to cut out dozens of loop pieces, measuring and cutting them all to the same size. Remember your base ribbon should be approximately 3 feet long.
Staple the loops to the base ribbon, covering the length of the base ribbon. Start at the bottom and lay the new loop on top of the previous loop, going all the way up to the top.
Once you’ve attached your loops you can add letter stickers to the top for personalization.You might add names, class year, school name, or other details.
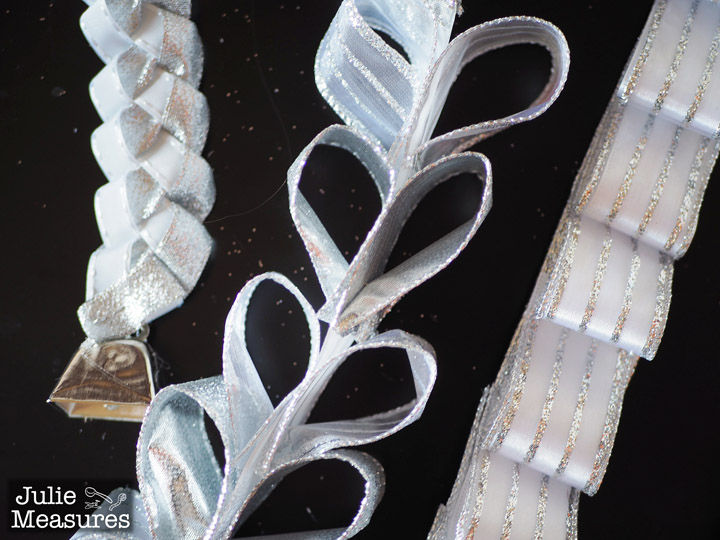
DIY Homecoming Mum – Heart Braid or Chain of Hearts
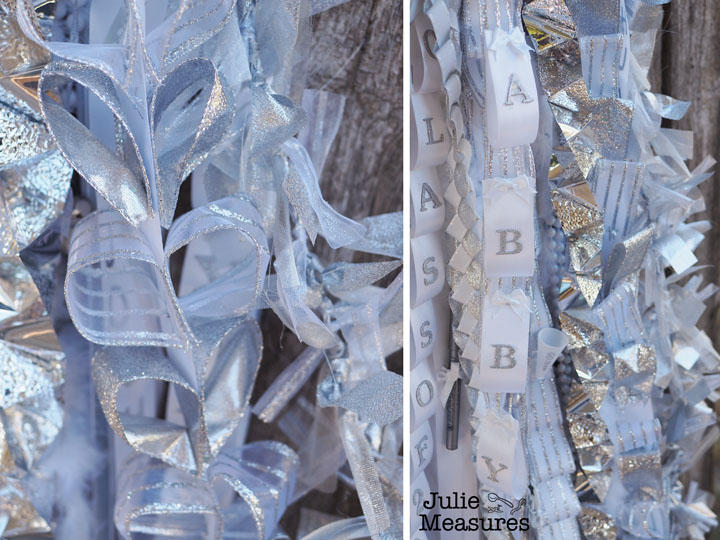
This mum ribbon is just the next step up from the loop ribbon. Again you will need a base ribbon and many (dozens) loops or ribbon. You should use at least two different kinds of ribbon, but they need to be the same width.
For this senior mum I’m using white and silver ribbons. For freshman, sophomores, and juniors you could use your school colors.

Here, instead of laying the loops one of top of another, they are placed on either side of the base ribbon and stapled at the bottom, creating a heart shape. Alternating the colors of the hearts makes a fun pattern.
On the right is another loop ribbon, this one more spaced out. Here you can also see the letter stickers on the loops. And I added small bow stickers at the top of each loop (they hide the staple).
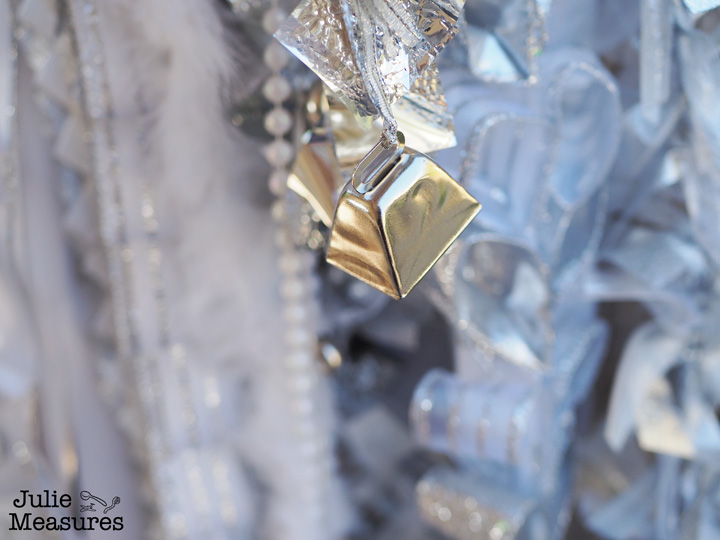
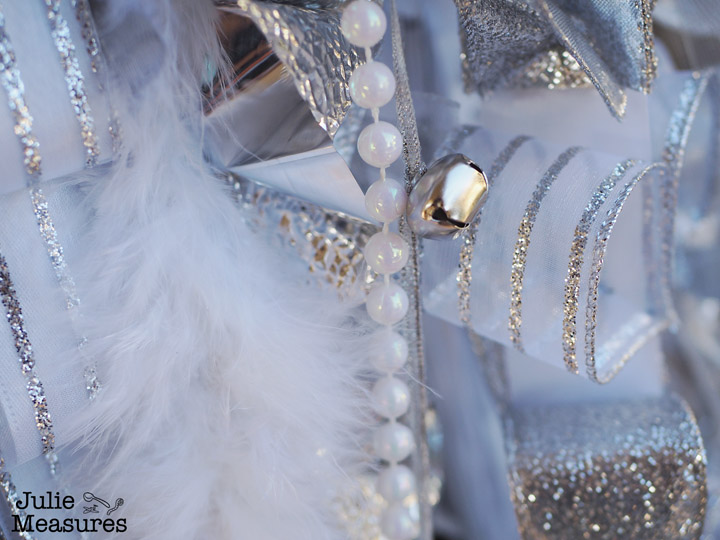
It’s not a homecoming mum without some bells! Bells can be tied onto thin ribbons by themselves or tied onto other ribbons.
Feathers are a big homecoming trend. Buy several feet of feather ribbon to add to your DIY mum.
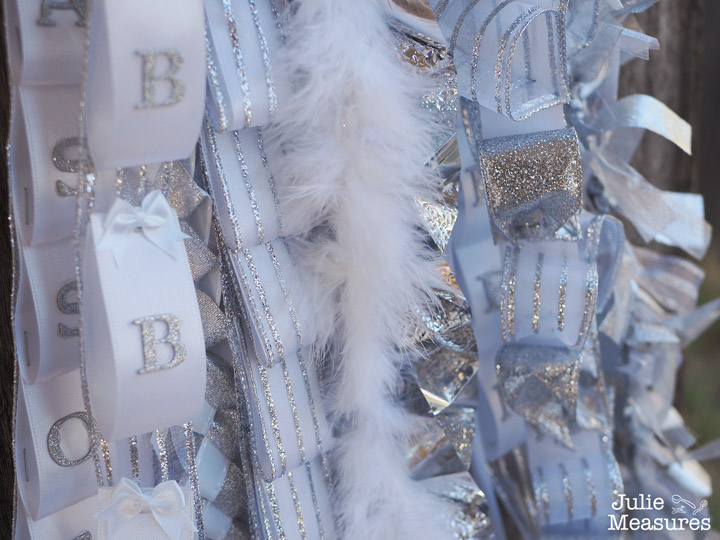
In addition to cowbells you can also add some small jingle bells for more noise. For a little added texture you might add strands of beads as well.
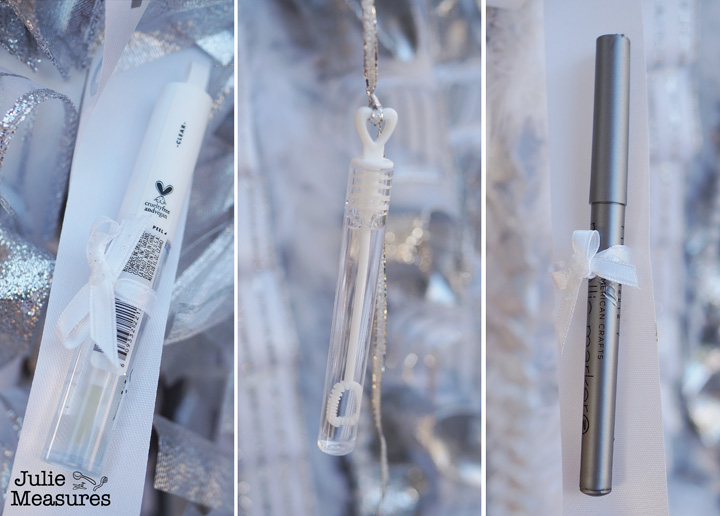
One of the most fun parts of making your own mum is throwing in all kinds of unique details! For this mum I added lip gloss, bubbles, and a marker. The lip gloss and marker are slipped through tied ribbon bows that were hot glued to ribbons. This way they can be easily used. The bubble wand is tied to a ribbon so it can easily be opened as well.
When you assemble your mum layer the solid ribbons in back to make a backdrop. Then start adding in some pretty braids and specialty ribbons. Mix up wider ribbons with skinnier ones, stapling and hot gluing everything to make it secure. Save the ribbons that you don’t want squished, like your loop ribbons, to go in the front. Tie on all your trinkets.
Your ready to head to the big homecoming game and cheer on your team!
See more details on how to assemble your DIY Homecoming Mum here
Leave a Reply
You must be logged in to post a comment.