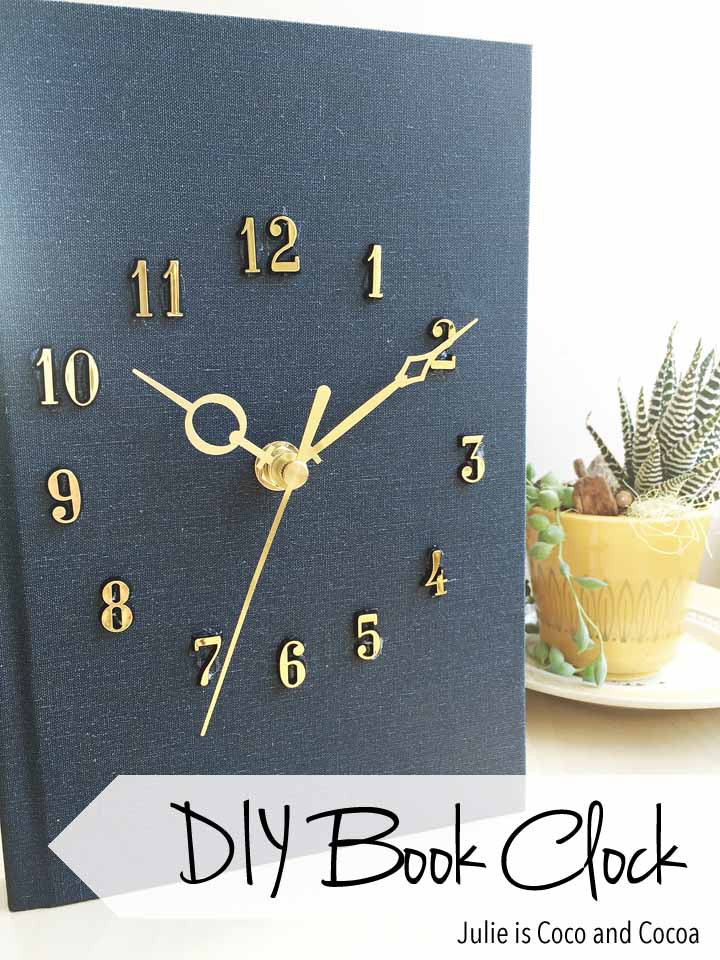
Are you a bibliophile? You know I am! Here’s a chance to add even more books to your home decor with a Hardcover Book Clock DIY.
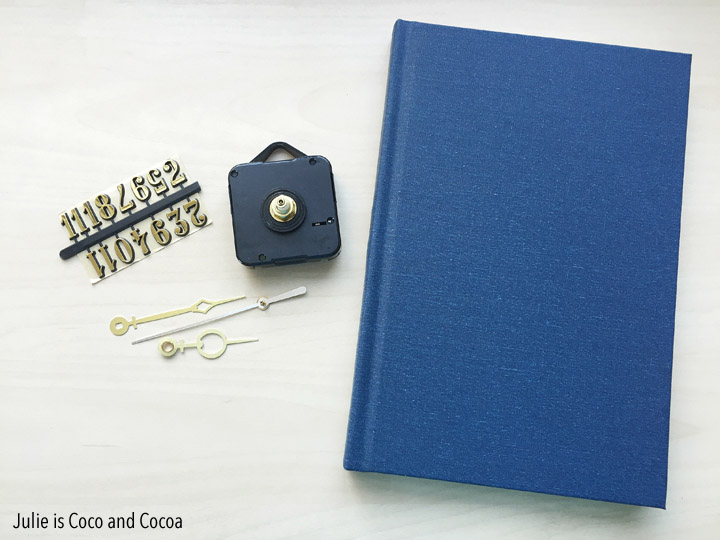
While I am normally against the destruction of a perfectly good book, I couldn’t help myself. The main supply for this project is, you guessed it, a book.
You will also need these supplies:
- Clock kit (you can purchase these at your local craft or hobby store)
- Drill
- Craft knife
- Hot glue gun and gluesticks
- Compass ruler
- ruler
- marker
When buying your supplies make sure to either pick a clock kit that will fit inside of your book or a book that is big enough for your clock kit. Whichever you buy first! The book needs to be at least as thick as the movement mechanism, which will fit inside the book.
Start by decided where to place the center of the clock face. Based on the size of my book I decided to center the face. I used a ruler to find the center and then made a mark so I would know where to drill.
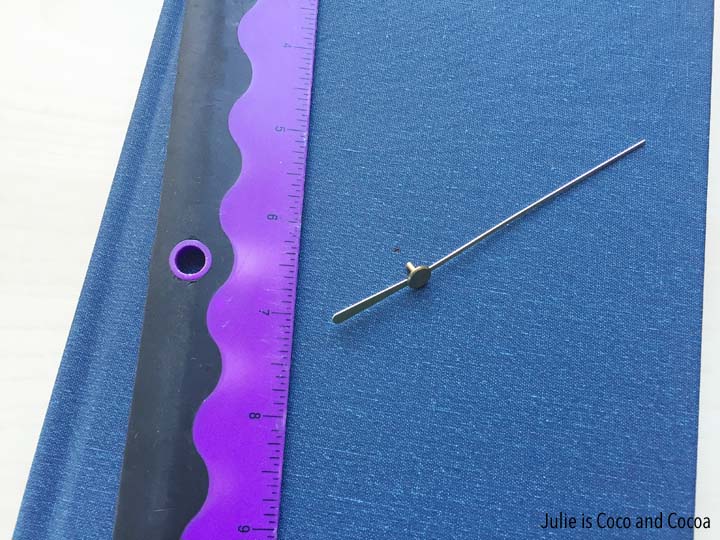
Start by deciding where to place the center of the clock face. Based on the size of my book I decided to center the face. I used a ruler to find the center and then made a mark so I would know where to drill.
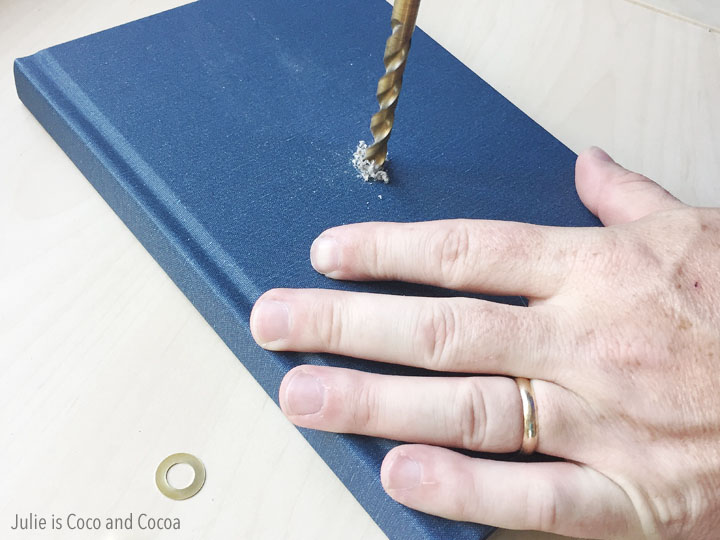
We drilled a hole through the cover of the book that was the diameter needed for the part of the movement that will stick through the cover and hold the clock hands. You might start with a smaller hole and gradually get larger until the hole is the size needed.
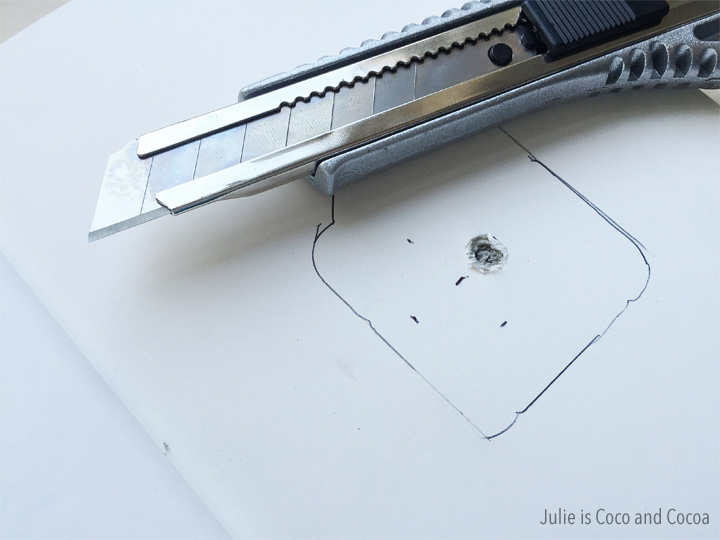
Once the hole was drilled I traced the movement on the inside of the book so I would know where to cut. I cut just outside of the lines that I traced so the movement would fit inside of where I was cutting.
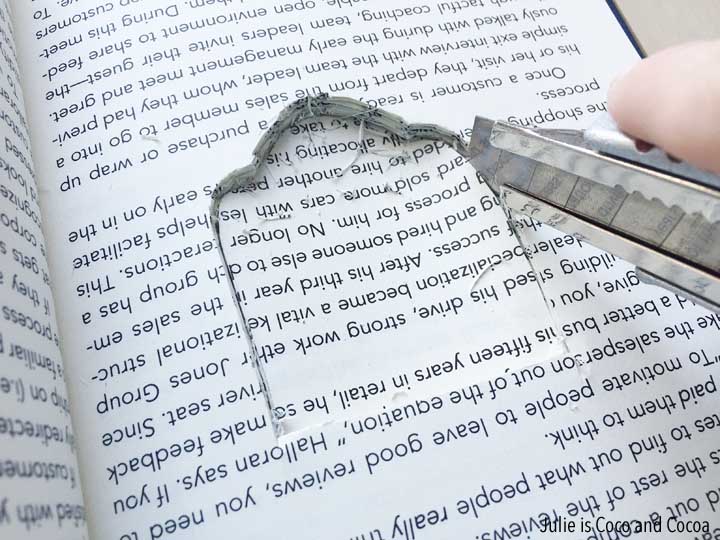
Using the craft knife cut along the lines that you traced and remove those pages. Use the removed pages as a guide as you continue to cut down through as many pages as needed to create a hole for your clock movement.
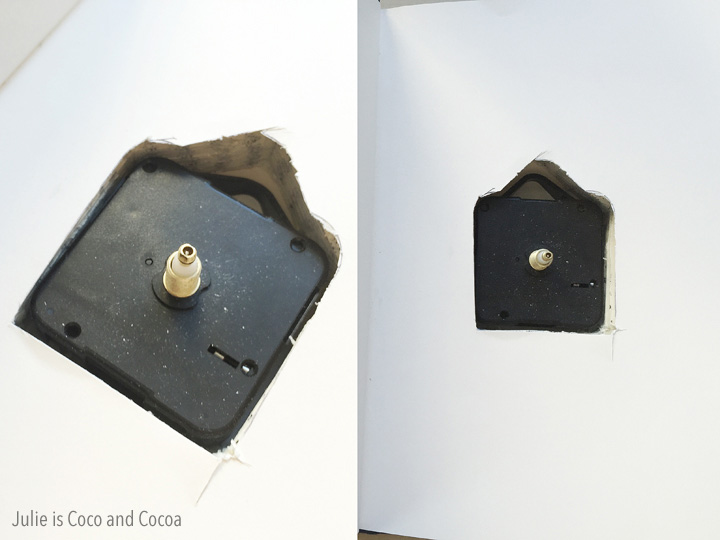
Once your book pages are hollowed out, place the movement inside of the hole you created to make sure everything fits nicely.
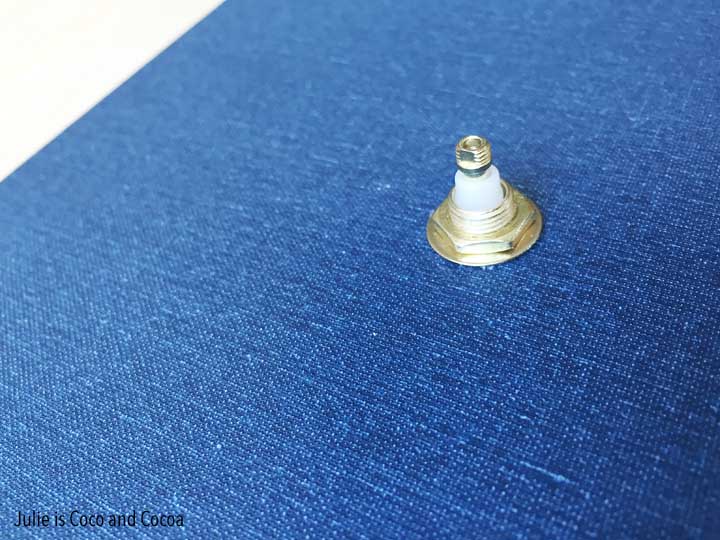
Close the cover and insert the part of the movement that holds the clock hands through the cover of the book. For my clock kit this is also where I placed a washer and nut (that came in my clock kit).
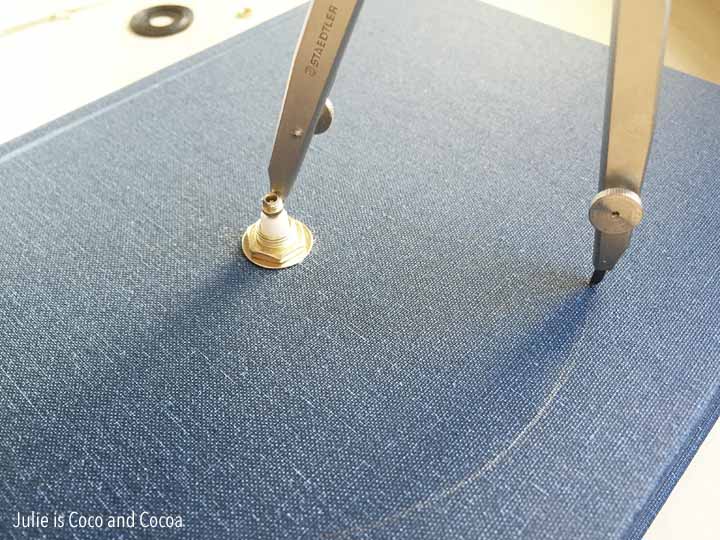
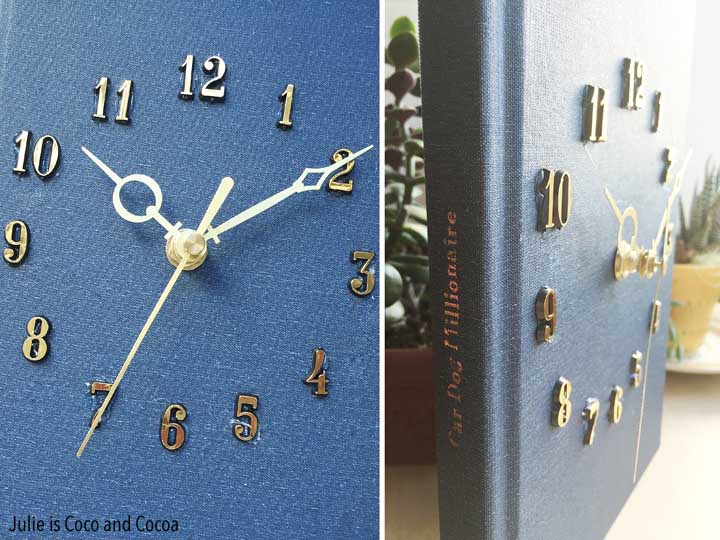
Next is adhering the numbers to the front of the book to create the clock face. I used a compass ruler to draw and light circle on the cover so I would be able to evenly place the numbers.
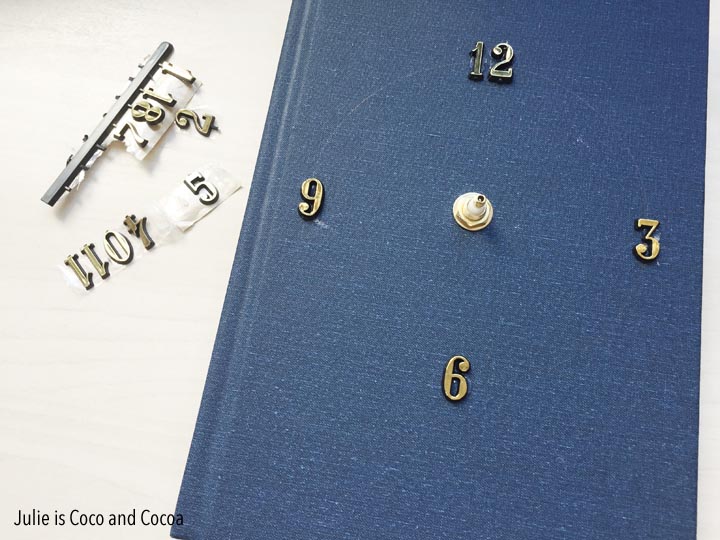
I started by placing the numbers 12, 3, 6, and 9. I used a ruler to help me find where to place these first 4 numbers.
You can place as many or as few numbers as you want, depending on the look for your finished clock. I wanted to use all of the numbers.
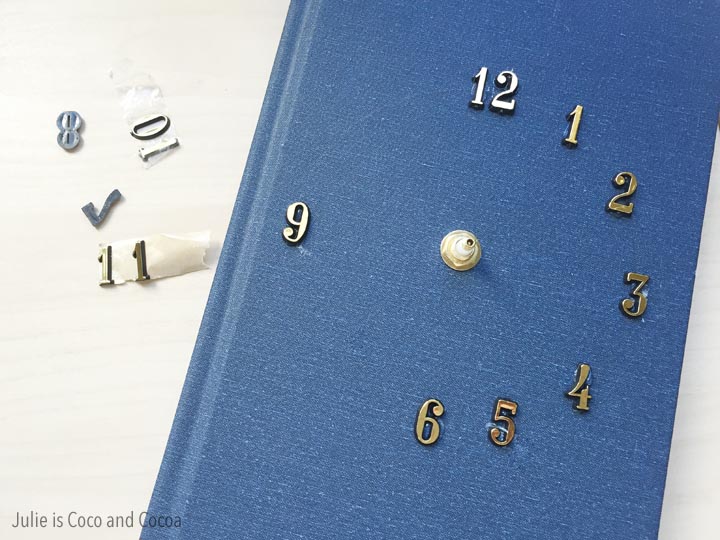
I think the numbers in my clock kit were supposed to be adhesive, but they didn’t stick very well to the book cover so I used a hot glue gun to attach them.
After I had the first 4 numbers attached I was able to evenly fill in the remaining numbers.
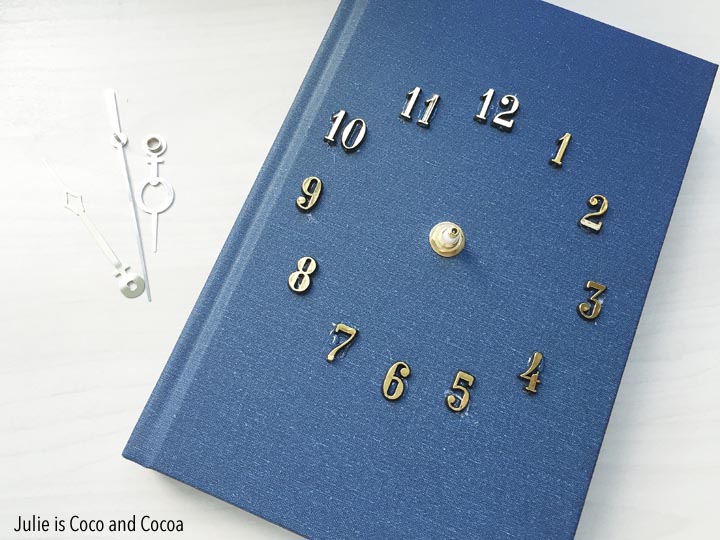
Once the numbers were all attached I could add the hour, minute, and second hand. Depending on the clock kit you purchase it may or may not include the second hand. My kit made the second hand optional.
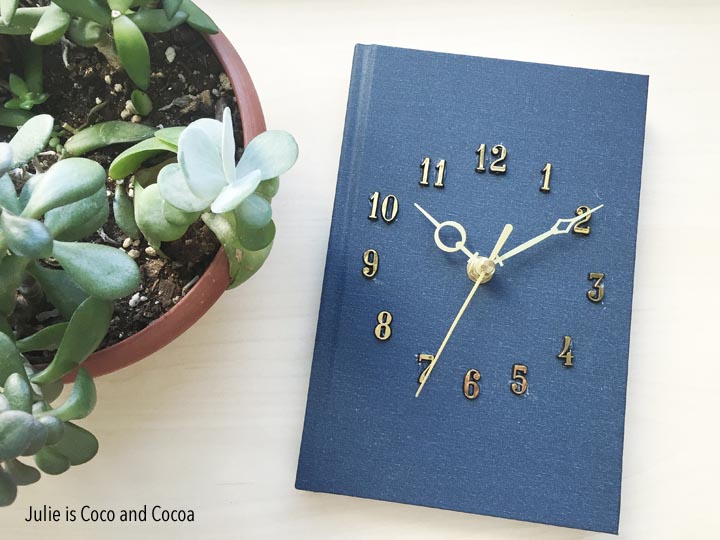
My finished book clock! Now everyone who walks in my door will know that I am an avid reader. I think I will be making some more of these in the future as gifts for teachers and my book reading friends.
Watch me make the DIY Book Clock LIVE
This post contains affiliate links. Purchasing through them help support this website at no extra cost to you.
This is such a cool idea. I’m a crafter too that appreciate creative out of the box craft ideas.
nice post Julie!
thanks for sharing with us. great idea
👍💜
Instead of destroying a real book, could you use a paper mache book?
Hi Kimberly!
I’m not sure a paper mache book would be sturdy enough, but you could try.
I went to the thrift store and chose an out of date history book. I didn’t want to use a book that someone could read and enjoy, so I looked for one that was a little beat up and that wouldn’t be a reliable source for information any more.
Best,
Julie
Hey..i love crafts & i love books. My question is i have 3 of the wooden books[hollow]do you think if i glue them together I would be able to do this project?
Hi Peggy!
You should be able to use hollow books. The inside will already have the space for the clock mechanisms. You’ll just need to drill a hole through the cover.
Thanks,
Julie